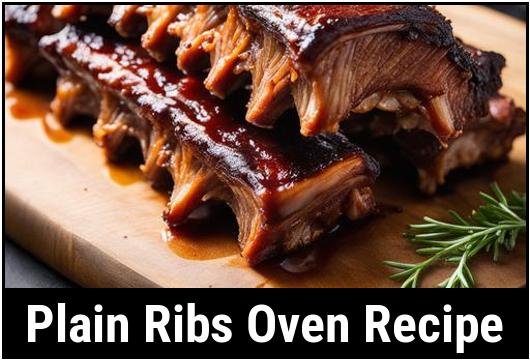
The Ultimate Guide To Making Perfect Plain Ribs In The Oven
If you are craving some juicy and tender ribs but don’t own a grill, don’t worry. You can achieve the same mouthwatering result by cooking them in the oven. Stripping away the frills and fuss that some barbecue enthusiasts add to their ribs, we will be focusing on a plain oven recipe that highlights the natural flavor of the meat.
In this ultimate guide, we will cover everything you need to know about making perfect plain ribs in the oven, from selection to serving. Whether you are a seasoned cook or a beginner, this guide will have you cooking up succulent ribs that will have your family and friends coming back for more.
Understanding the Food Science of Ribs
Before we delve into the cooking part, let’s take a look at what makes ribs such a special cut of meat. Pork ribs are part of the spareribs section of the pig, located in the abdominal area. These bones are long and flat, with varying lengths and thicknesses. They are composed of different muscles and connective tissue that contribute to their unique flavor and texture.
One of the most important components of ribs is collagen, a protein that makes up connective tissue. When cooking, the collagen breaks down into gelatin, which gives the ribs their succulent and tender texture. The longer and slower the cooking process, the more collagen converts to gelatin, resulting in a fall-off-the-bone texture.
Selecting the Right Ribs
When selecting ribs, you want to look for quality meat that has been sourced from a reputable farm. Ideally, you want ribs with a good balance of meat and fat, as this contributes to flavor and moisture. Avoid ribs that have a lot of visible fat or a dry or discolored appearance.
There are two types of ribs: baby back ribs and spare ribs. Baby back ribs come from the top of the pig’s ribcage and are the most tender and leaner of the two. Spare ribs come from the belly area and have more meat and fat, resulting in a juicier and more flavorful cut.
Both types of ribs work well for oven cooking, but you should choose the one that suits your preferences.
Cleaning the Ribs

Before cooking, you need to prepare the ribs by cleaning them. Start by removing any excess fat or membrane that might be present on the meat’s surface. You can use a sharp knife or a pair of kitchen shears to cut or pull it off.
Next, rinse the ribs under cool running water to remove any debris or blood. Pat them dry with a paper towel or a clean kitchen cloth.
Preparing the Ribs
Now that you have cleaned your ribs, it’s time to prepare them for cooking. First, you need to season the meat. For our plain rib recipe, we will keep the seasoning simple to highlight the meat’s natural flavor.
You will need:
-
2 tablespoons of kosher salt
-
2 tablespoons of black pepper
-
2 tablespoons of garlic powder
-
1 tablespoon of onion powder
-
1 tablespoon of smoked paprika
Mix all the seasonings in a small bowl.
Then, place the ribs on a large baking sheet and sprinkle the seasoning mix generously on both sides. Use your hands to rub it in, making sure to coat the meat evenly.
Preheat your oven to 250°F (120°C).
Next, cover the baking sheet with aluminum foil, making sure to seal it tightly around the edges. This will create a steamy environment that will help tenderize the meat while cooking.
Place the baking sheet in the oven and cook the ribs for approximately 2-3 hours. The cooking time will depend on the thickness of your ribs, so you should check them periodically.
Tips for Perfect Ribs
-
If possible, marinate the ribs for a few hours or overnight in your favorite marinade. This will give the meat extra flavor and tenderness.
-
Don’t overcrowd the baking sheet. If you need to cook more ribs, use two baking sheets, or cook them in batches.
-
When removing the membrane from the ribs, start from one end and loosen it with a butter knife or a spoon handle until you can grip it with your fingers. Slowly pull it off by pulling it back and forth. This will help the seasoning and smoke penetrate the meat better.
-
If you want a crispy exterior on your ribs, remove the aluminum foil during the last hour of cooking.
-
Let the ribs rest for 10-15 minutes after cooking before cutting them. This will allow the juices to redistribute throughout the meat, resulting in a juicier and more flavorful dish.
How to Check for Doneness

As we mentioned earlier, the cooking time of the ribs will vary according to their thickness and your oven’s performance. To check for doneness, you can do the following:
-
Check the meat’s internal temperature. Insert a meat thermometer into the thickest part of the meat, avoiding the bone. When the temperature reaches 185°F (85°C), the ribs are done.
-
Perform a "bend test." Using a pair of tongs, pick up one end of the rib rack and give it a gentle bend. If the meat cracks or breaks apart, it is overcooked. If it bends slightly and holds its shape, it is cooked to perfection.
-
Cut into the meat. Using a sharp knife, cut into the thickest part of the meat, near the bone. If the meat is pink or bloody, it is undercooked. If it is white or opaque, it is cooked.
Recipe: Plain Ribs in the Oven
Here’s a recap of our plain ribs in the oven recipe:
Ingredients:
-
Pork ribs (baby back or spare)
-
2 tablespoons of kosher salt
-
2 tablespoons of black pepper
-
2 tablespoons of garlic powder
-
1 tablespoon of onion powder
-
1 tablespoon of smoked paprika
Instructions:
-
Preheat your oven to 250°F (120°C).
-
Remove any excess fat or membrane from the ribs.
-
Rinse the meat under cool running water and pat it dry with a paper towel or a clean kitchen cloth.
-
Mix the spices in a small bowl.
-
Place the ribs on a large baking sheet and sprinkle the seasoning mix generously on both sides. Use your hands to rub it in, making sure to coat the meat evenly.
-
Cover the baking sheet with aluminum foil, making sure to seal it tightly around the edges.
-
Place the baking sheet in the oven and cook the ribs for approximately 2-3 hours, checking for doneness periodically.
-
Remove the aluminum foil during the last hour of cooking if you want crispy ribs.
-
Let the ribs rest for 10-15 minutes before cutting and serving.
Variations
While the plain ribs are delicious on their own, you can add some extra flair to the dish by trying out different marinades, sauces, or rubs. Here are some ideas:
-
BBQ sauce: Brush your favorite BBQ sauce on the ribs during the last 15-20 minutes of cooking for a classic smoky flavor.
-
Honey and mustard glaze: Mix equal parts honey and Dijon mustard and paint it on the ribs during the last 30 minutes of cooking for sweet and savory ribs.
-
Asian-inspired marinade: Mix soy sauce, rice vinegar, hoisin sauce, ginger, and garlic, and marinate the ribs for at least two hours before cooking for a savory and umami taste.
-
Dry rub: Mix together some chili powder, brown sugar, cumin, and salt and rub it onto the ribs before cooking for a spicy and sweet taste.
Conclusion
Cooking perfect plain ribs in the oven might seem intimidating, but with the right method and some patience, you can achieve mouthwatering results that will impress anyone. Remember to select quality meat, season it generously, and cook it low and slow for a fall-off-the-bone texture. Try out different variations to find your favorite flavor profile and enjoy your delicious ribs with your favorite sides and a cold drink. Happy cooking!
Sources
FAQS On Plain Ribs Oven Recipe
What Ingredients Do I Need To Make Plain Ribs In The Oven?
To make plain ribs in the oven, you will need the following ingredients:
- 2 racks of pork baby back ribs
- 2 tablespoons of olive oil
- 2 teaspoons of salt
- 2 teaspoons of black pepper
- 2 teaspoons of paprika
- 2 teaspoons of garlic powder
- 2 teaspoons of onion powder
- Your choice of barbecue sauce (optional)
How Do I Prepare The Ribs Before Cooking Them In The Oven?
Before cooking the ribs in the oven, it is essential to remove the thin membrane from the bone side of the ribs. This can be done by gently sliding a knife or your fingers under the membrane and peeling it away. This step is crucial as it allows the seasoning to penetrate the meat better and results in more tender ribs.
What Is The Recommended Cooking Method For Plain Ribs In The Oven?
The recommended cooking method for plain ribs in the oven involves a two-step process: baking and broiling. First, preheat the oven to 275°F (135°C). Place the ribs on a baking sheet lined with aluminum foil and brush them with olive oil. Then, combine the salt, black pepper, paprika, garlic powder, and onion powder in a small bowl and season the ribs generously on both sides. Cover the sheet tightly with another layer of foil and bake the ribs for 2.5 to 3 hours, or until they are tender. Next, remove the top layer of foil and brush the ribs with your choice of barbecue sauce, if desired. Finally, broil the ribs for 5-7 minutes, or until the sauce becomes slightly caramelized.
How Do I Know When The Plain Ribs Are Cooked To Perfection?
The key to determining if the plain ribs are cooked to perfection lies in their tenderness. After baking them for the recommended time, you can check the doneness by carefully inserting a fork or a skewer between the bones. The meat should easily pull away from the bone and be fork-tender. If there is still resistance, you may need to return the ribs to the oven for a bit longer.
Can I Make Plain Ribs In The Oven Ahead Of Time?
Yes, you can make plain ribs in the oven ahead of time. Once the ribs are cooked, allow them to cool slightly before tightly wrapping them in aluminum foil. Store them in the refrigerator for up to 2 days. When you are ready to serve, simply reheat the ribs in a preheated oven at 350°F (175°C) for about 20-30 minutes, or until they are heated through.


