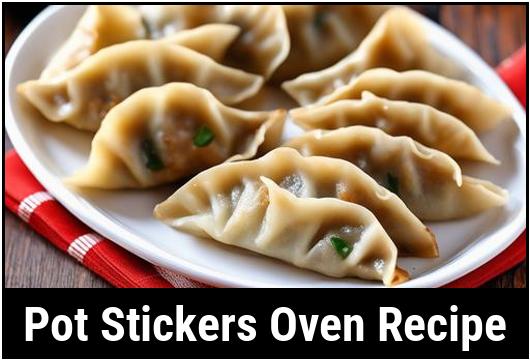
Pot Stickers Oven Recipe: A Comprehensive Guide
Pot stickers, also known as dumplings, are a beloved dish in many Asian cuisines. Traditionally, they are pan-fried, resulting in a crispy bottom and tender, juicy filling. However, not everyone enjoys the hassle and mess of frying. Fortunately, there’s an alternative method: cooking pot stickers in the oven. This method offers a convenient and less messy way to enjoy these delectable treats without compromising on flavor and texture.
In this comprehensive guide, we’ll delve into the science behind cooking pot stickers in the oven, explore the best ingredients to use, provide detailed instructions on preparation, and reveal the optimal oven temperature and timing for perfect results. Finally, we’ll walk you through a step-by-step oven recipe to create delicious pot stickers in your own kitchen.
Food Science Of Cooking Pot Stickers In An Oven
Cooking pot stickers in the oven differs from the traditional pan-frying method in several ways. Understanding the science behind this cooking technique can help you achieve optimal results.
Heat Distribution
Unlike pan-frying, where heat is primarily applied from the bottom, oven cooking relies on all-around heat distribution. This results in even cooking and browning on all sides of the pot stickers, ensuring a consistent texture throughout.
Moisture Retention
One challenge of oven cooking is moisture retention. Pot stickers contain a filling that can release moisture during cooking. To prevent sogginess, it’s crucial to ensure proper ventilation and spacing between each dumpling on the baking sheet.
Browning Reaction
The Maillard reaction, which occurs between amino acids and reducing sugars when exposed to heat, is responsible for the browning and flavor development in cooked foods. While pan-frying provides direct contact between the pot sticker and the hot surface, oven cooking relies on indirect heat transfer. To achieve a golden-brown exterior, it’s essential to brush the pot stickers with oil before baking.
Choosing Ingredients
Selecting the right ingredients is essential for making delicious pot stickers. Here’s what you’ll need:
Wrapper
Choose store-bought or homemade dumpling wrappers. Look for thin, round wrappers made from wheat flour for the best texture.
Filling
The filling is where you can get creative. A classic pot sticker filling consists of ground pork, finely chopped vegetables (such as cabbage, scallions, and ginger), and seasonings like soy sauce, sesame oil, and garlic. However, feel free to customize the filling to your taste preferences, incorporating ingredients like shrimp, chicken, tofu, or mushrooms.
Dipping Sauce
Prepare a flavorful dipping sauce to accompany your pot stickers. A simple yet delicious sauce can be made with soy sauce, rice vinegar, sesame oil, and a touch of chili paste or sriracha for heat.
Preparing Ingredients
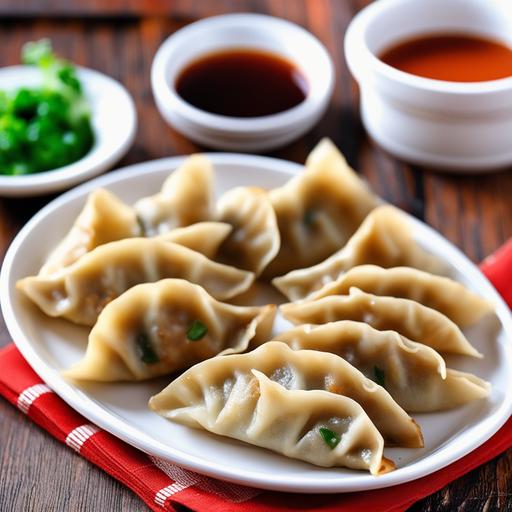
Proper preparation of the ingredients is key to making excellent pot stickers. Here’s how to do it:
Filling Preparation
- Chop Vegetables: Finely chop the vegetables for the filling, ensuring they’re small enough to blend well and not create lumps in the filling.
- Seasoning: In a bowl, combine the ground pork, chopped vegetables, and seasonings. Mix thoroughly until well combined.
Wrapper Preparation
- Thaw Frozen Wrappers: If using store-bought frozen wrappers, thaw them according to the package instructions.
- Assembling: Place a small amount of filling in the center of each wrapper. Moisten the edges of the wrapper with water, then fold and crimp to seal the dumplings.
Optimal Oven Cooking Temperature & Timing
Achieving the perfect texture and flavor for your pot stickers requires careful attention to oven temperature and timing. Here are the recommended settings:
Oven Temperature
Preheat your oven to 400°F (200°C). This temperature allows for sufficient heat to cook the pot stickers evenly while ensuring a crispy exterior.
Cooking Time
Bake the pot stickers for 12-15 minutes, or until they are golden brown and crispy on the outside. Keep an eye on them towards the end of the cooking time to prevent burning.
Pot Stickers Oven Recipe
Now that you have all the necessary information, let’s dive into the step-by-step process of making pot stickers in the oven:
Ingredients
- 1 package dumpling wrappers
- 1 lb (450g) ground pork
- 2 cups finely chopped cabbage
- 3 scallions, finely chopped
- 2 cloves garlic, minced
- 1 tablespoon grated ginger
- 2 tablespoons soy sauce
- 1 tablespoon sesame oil
- 1 teaspoon salt
- 1/2 teaspoon black pepper
- Vegetable oil, for brushing
Instructions
-
Preheat the Oven: Preheat your oven to 400°F (200°C) and line a baking sheet with parchment paper.
-
Prepare the Filling: In a large bowl, combine the ground pork, chopped cabbage, scallions, garlic, ginger, soy sauce, sesame oil, salt, and pepper. Mix until well combined.
-
Assemble the Pot Stickers: Place a small spoonful of filling in the center of each dumpling wrapper. Moisten the edges with water, then fold and crimp to seal the dumplings. Place the sealed dumplings on the prepared baking sheet.
-
Brush with Oil: Lightly brush the tops of the pot stickers with vegetable oil. This will help them brown and crisp up in the oven.
-
Bake: Transfer the baking sheet to the preheated oven and bake for 12-15 minutes, or until the pot stickers are golden brown and crispy.
-
Serve: Remove the pot stickers from the oven and let them cool for a few minutes before serving. Serve with your favorite dipping sauce and enjoy!
Cooking pot stickers in the oven offers a convenient and delicious alternative to traditional pan-frying. By understanding the science behind oven cooking, selecting the right ingredients, and following the recommended temperature and timing, you can achieve perfect results every time. With this oven recipe, you can enjoy homemade pot stickers with crispy exteriors and flavorful fillings in the comfort of your own kitchen.
Doneness Checks
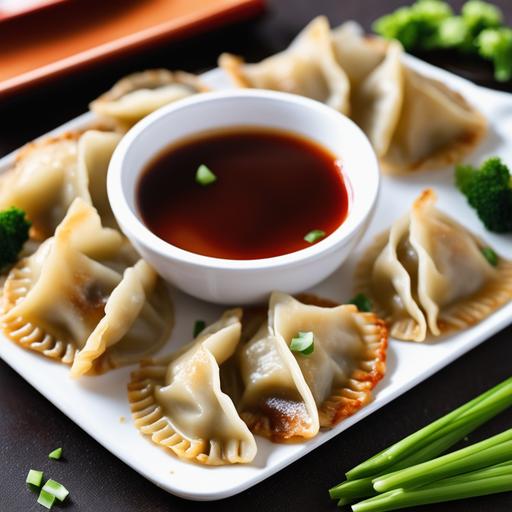
Making pot stickers in the oven offers several advantages over traditional pan-frying. It eliminates the need for constant monitoring and flipping, resulting in a more hands-off cooking experience. Additionally, baking pot stickers yields a consistent and evenly cooked batch without the risk of burning or uneven browning.
To begin, gather your ingredients. You’ll need:
- Dumpling wrappers
- Filling of your choice (common options include ground pork, chicken, shrimp, or tofu combined with vegetables and seasonings)
- Soy sauce
- Sesame oil
- Rice vinegar
- Scallions (for garnish, optional)
Once you have assembled your ingredients, preheat your oven to 375°F (190°C). While the oven is heating, prepare your pot stickers by filling each wrapper with a spoonful of filling and sealing them tightly.
Determining when pot stickers are done can be tricky, especially when baking them in the oven. Here are a few visual and tactile cues to help you gauge their doneness:
1. Golden Brown Color
When pot stickers are properly cooked, they should develop a golden brown hue on the exposed surfaces. This indicates that the dough has crisped up and the filling has cooked through.
2. Crispy Texture
Gently touch the surface of a pot sticker. It should feel crisp and firm, indicating that the dough has cooked thoroughly and developed a satisfying crunch.
3. Internal Temperature
If you’re uncertain whether the filling is cooked through, use a meat thermometer to check the internal temperature. The filling should register at least 165°F (74°C), ensuring that any meat or seafood is fully cooked and safe to eat.
Undercooking
Undercooking pot stickers can result in a doughy texture and raw filling, which is not only unappetizing but also poses a health risk, especially if the filling contains meat or seafood. Here are some common reasons why pot stickers may be undercooked and how to prevent it:
1. Insufficient Baking Time
If you remove pot stickers from the oven too early, they may still be undercooked. Be patient and allow them to bake until they achieve a golden brown color and crispy texture.
2. Overcrowding
Overcrowding the baking tray can hinder airflow and prevent even cooking. Make sure to leave enough space between each pot sticker to ensure that they cook evenly.
3. Thick Dough
If the dough wrappers are too thick, they may take longer to cook through, resulting in undercooked pot stickers. Use thin wrappers and ensure that they are sealed tightly to prevent any filling from leaking out during baking.
To remedy undercooked pot stickers, simply return them to the oven and continue baking until they reach the desired doneness.
Overcooking
Overcooking pot stickers can lead to dry and tough dumplings with burnt edges, detracting from their delicate flavor and texture. Here’s how to avoid overcooking your pot stickers:
1. Monitor Closely
Keep a close eye on your pot stickers as they bake to prevent them from becoming overly crispy or burnt. Check them periodically and adjust the baking time as needed.
2. Lower Temperature
If you find that your pot stickers are browning too quickly, reduce the oven temperature slightly to slow down the cooking process. This will give the filling more time to cook through without burning the exterior.
3. Proper Sealing
Ensure that the pot stickers are sealed tightly before baking to prevent any filling from leaking out. Any exposed filling can dry out and become tough when exposed to the heat of the oven.
If you accidentally overcook your pot stickers, they may still be salvageable. Try brushing them with a bit of water or broth to rehydrate them slightly and soften any dried-out areas.
Troubleshooting
Despite your best efforts, you may encounter some issues while making pot stickers in the oven. Here are some common problems and their solutions:
1. Sticking To The Pan
If your pot stickers stick to the baking tray, it may be due to insufficient oil or a non-stick surface. Use parchment paper or a silicone baking mat to prevent sticking, or lightly grease the tray before placing the pot stickers on it.
2. Uneven Browning
Uneven browning can occur if the pot stickers are not spaced evenly on the baking tray or if the oven temperature is inconsistent. Arrange the pot stickers in a single layer with some space between each one, and consider rotating the tray halfway through the baking time to ensure even cooking.
3. Soggy Bottoms
If the bottoms of your pot stickers are soggy instead of crispy, it may be because they are sitting in excess moisture while baking. Place the pot stickers on a wire rack set over a baking sheet to allow air to circulate around them and prevent them from becoming soggy.
Recipe Variations
While traditional pot stickers typically feature a pork filling, there are countless variations you can experiment with to suit your taste preferences or dietary restrictions. Here are a few ideas to inspire your creativity:
1. Vegetarian
Substitute the meat filling with a mixture of finely chopped vegetables, such as cabbage, carrots, mushrooms, and water chestnuts, seasoned with soy sauce, garlic, and ginger.
2. Seafood
Use a combination of shrimp, crab, or finely diced fish mixed with minced garlic, scallions, and a touch of sesame oil for a delicious seafood twist on pot stickers.
3. Spicy
Add some heat to your pot stickers by incorporating ingredients like chili paste, Sriracha, or crushed red pepper flakes into the filling mixture. Pair with a tangy dipping sauce for a flavor-packed experience.
4. Fusion
Experiment with different flavor profiles by combining traditional Asian ingredients with global influences. For example, try filling pot stickers with a mixture of ground lamb, feta cheese, and mint for a Mediterranean-inspired twist.
Feel free to get creative and customize your pot stickers to suit your personal taste preferences and culinary imagination.
Making pot stickers in the oven is a convenient and fuss-free alternative to traditional pan-frying. By following the tips and techniques outlined in this guide, you can achieve perfectly cooked pot stickers with a crispy exterior and juicy filling every time. Whether you stick with the classic pork filling or venture into more adventurous flavor combinations, baking pot stickers allows you to enjoy this beloved dish with minimal effort and maximum flavor. So preheat your oven, gather your ingredients, and get ready to indulge in a delightful culinary experience that will tantalize your taste buds and impress your guests.
Flavour Enhancement Tips
Pot stickers are a staple of Chinese cuisine, believed to have originated in the northern regions of China. These dumplings consist of a filling made from ground meat (usually pork or chicken), vegetables, and seasonings, encased in a thin dough wrapper. The name "pot sticker" comes from the cooking method: after being pan-fried to create a crispy bottom, they are steamed by adding water to the pan and covering it, causing the dumplings to stick to the pot.
While the traditional method of cooking pot stickers yields delicious results, it can be time-consuming and requires careful attention to prevent sticking or burning. This oven recipe offers a convenient alternative that produces equally tasty pot stickers with less hands-on effort.
To enhance the flavor of your pot stickers, consider incorporating the following tips:
1. Seasoning The Filling
Ensure your filling is well-seasoned with a combination of ingredients such as soy sauce, ginger, garlic, green onions, sesame oil, and white pepper. Adjust the seasoning to your taste preferences, but aim for a balance of salty, savory, and aromatic flavors.
2. Marinating The Meat
If your filling includes ground meat, marinate it before assembling the pot stickers. A simple marinade of soy sauce, rice wine, and a touch of sugar can help tenderize the meat and infuse it with additional flavor.
3. Adding Umami Boosters
Consider adding umami-rich ingredients to your filling, such as finely chopped mushrooms, dried shrimp, or bamboo shoots. These ingredients contribute depth of flavor and complexity to the filling.
4. Experimenting With Fillings
Don’t hesitate to get creative with your filling ingredients. While traditional pot stickers often contain pork or chicken, you can customize the filling to suit your preferences or dietary restrictions. Try incorporating tofu, shrimp, or a variety of vegetables for a unique twist.
Texture Enhancement Tips
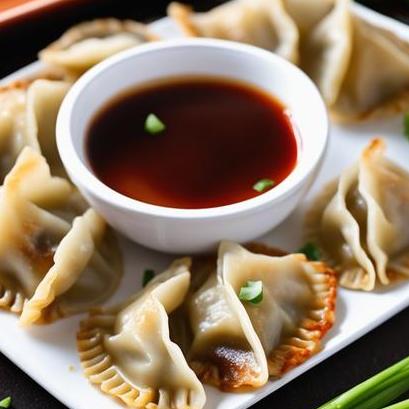
Achieving the perfect texture is key to a satisfying pot sticker experience. Follow these tips to ensure your pot stickers have a delightful texture:
1. Using The Right Wrapper
Choose thin, round dumpling wrappers for optimal texture. These wrappers should be pliable enough to fold easily without tearing, yet sturdy enough to hold the filling without breaking during cooking.
2. Properly Sealing The Pot Stickers
Ensure that you seal the edges of the pot stickers tightly to prevent any filling from leaking out during cooking. Crimp the edges firmly and evenly to create a secure seal.
3. Crisping The Bottoms
For that characteristic crispy bottom, it’s essential to pan-fry the pot stickers briefly before transferring them to the oven. This step creates a golden-brown crust that contrasts beautifully with the tender filling.
4. Adjusting Baking Time
Pay attention to the baking time and temperature to achieve the desired texture. Baking the pot stickers at a high temperature for a shorter duration can result in a crispy exterior, while a lower temperature for a longer duration may yield a softer texture.
Cooking At Different Temperatures
The cooking temperature plays a crucial role in the texture and flavor development of your pot stickers. Here’s how to adjust the temperature for different outcomes:
1. High Temperature (400°F – 425°F)
Baking pot stickers at a high temperature ensures rapid heat transfer, resulting in a crispy exterior. This method is ideal for achieving a crunchy texture reminiscent of pan-fried pot stickers.
2. Medium Temperature (350°F – 375°F)
Opting for a moderate temperature allows the pot stickers to cook more gently, resulting in a softer texture. This approach is suitable for those who prefer a tender, slightly chewy dumpling wrapper.
3. Low Temperature (300°F – 325°F)
Baking pot stickers at a low temperature promotes even cooking and prevents excessive browning. This method is ideal for those who prefer a softer, more steamed-like texture with less emphasis on crispiness.
Cooking Tips
Follow these cooking tips to ensure your pot stickers turn out perfectly every time:
1. Preheating The Oven
Preheat your oven to the desired temperature before placing the pot stickers inside. This ensures that the oven is at the proper temperature for even cooking from the start.
2. Arranging Pot Stickers
Arrange the pot stickers in a single layer on a baking sheet lined with parchment paper or a silicone baking mat. Leave some space between each dumpling to allow air circulation for even cooking.
3. Brushing With Oil
Lightly brush the tops of the pot stickers with oil before baking to encourage browning and enhance flavor. A neutral oil like vegetable or canola oil works well for this purpose.
4. Monitoring The Cooking Process
Keep an eye on the pot stickers while they’re baking to prevent overcooking or burning. Rotate the baking sheet halfway through the cooking time for even browning.
Serving Suggestions
Once your pot stickers are hot and crispy from the oven, consider serving them with a variety of dipping sauces and accompaniments. Here are some serving suggestions to complement your delicious dumplings:
1. Dipping Sauces
Serve your pot stickers with a selection of dipping sauces, such as soy sauce, rice vinegar, chili oil, or a combination of these flavors. Experiment with different ratios and ingredients to find your favorite dipping sauce combination.
2. Side Dishes
Pair your pot stickers with traditional Chinese side dishes like steamed rice, stir-fried vegetables, or a refreshing cucumber salad. These accompaniments add variety to your meal and balance out the richness of the dumplings.
3. Garnishes
Garnish your pot stickers with thinly sliced green onions, toasted sesame seeds, or a sprinkle of crushed red pepper flakes for added flavor and visual appeal. These simple touches elevate the presentation of your dish.
Conclusion
In conclusion, oven-baked pot stickers offer a convenient and delicious alternative to traditional pan-fried dumplings. By following the tips and techniques outlined in this guide, you can achieve crispy, flavorful pot stickers with minimal effort. Whether you’re serving them as an appetizer, snack, or main course, these oven-baked pot stickers are sure to impress your family and friends with their irresistible taste and texture. Experiment with different fillings, cooking temperatures, and serving suggestions to customize your pot sticker experience to your liking. Enjoy!
FAQS
Can I Make Pot Stickers In The Oven?
Yes, you can definitely make pot stickers in the oven. While traditionally these dumplings are pan-fried, baking them in the oven provides a healthier alternative.
How Long Does It Take To Cook Pot Stickers In The Oven?
The cooking time for pot stickers in the oven usually ranges between 15 to 20 minutes. However, it may vary depending on the size and thickness of the dumplings and the temperature of your oven.
What Temperature Should I Set My Oven To When Baking Pot Stickers?
Preheat your oven to 400°F (200°C) to achieve the perfect golden brown and crispy texture on the pot stickers.
Do I Need To Defrost Frozen Pot Stickers Before Baking Them In The Oven?
Yes, it is recommended to defrost frozen pot stickers before baking them in the oven. This ensures that they cook evenly and prevents any potential for the dumplings to become soggy. Simply let them thaw in the refrigerator or at room temperature before baking.
How Do I Prevent The Pot Stickers From Sticking To The Baking Sheet?
To prevent the pot stickers from sticking to the baking sheet, it is advisable to lightly brush or spray the sheet with cooking oil. Additionally, you can place a sheet of parchment paper or aluminum foil on the baking sheet for even easier removal.


