

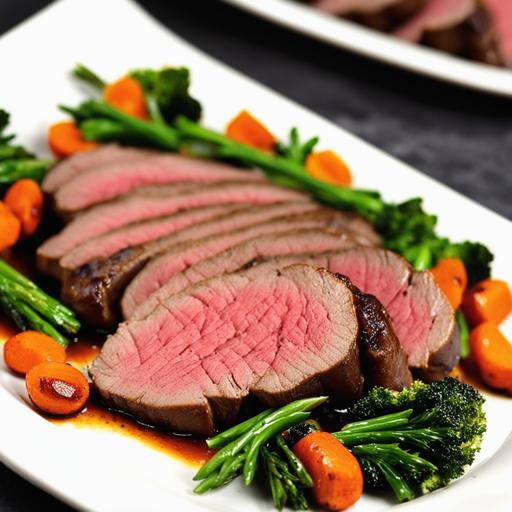
The Exquisite Deer Tenderloin Oven Recipe: A Culinary Masterpiece
If you’re looking to elevate your culinary skills and impress your guests with a dish that combines tenderness and flavor, then look no further than the deer tenderloin oven recipe. This exquisite dish is a true testament to the art of cooking, highlighting the unique qualities of venison and providing a fulfilling gastronomic experience. In this comprehensive guide, we will delve into the food science, culinary details, selection, cleaning, preparation, tips, variations, doneness checks, and everything you need to know to successfully execute this recipe with confidence.
Food Science: Venison’s Unique Qualities
Deer tenderloin, also known as venison tenderloin, offers a distinctive taste and texture that sets it apart from other meats. Its lean and tender nature, coupled with a subtly gamy flavor, make it an excellent choice for various culinary preparations. Understanding the scientific aspects behind cooking venison can help you achieve the perfect results every time.
When it comes to cooking deer tenderloin, keeping in mind the low fat content is crucial. Since fat contributes to moisture and tenderness in meat, venison’s leanness makes it more susceptible to drying out if not cooked properly. However, with the right techniques and attention, you can unlock its exceptional potential and create a succulent and savory masterpiece.
Culinary Details and Selection
Choosing the right cut of deer tenderloin is crucial to ensure a successful outcome. Look for fresh and undamaged tenderloins with a vibrant color and minimal connective tissue. The tenderloin should feel firm to the touch, indicating its freshness.


When selecting venison, you can either butcher the deer yourself or reach out to a trusted butcher. If you’re an avid hunter, this can be an excellent opportunity to utilize your own harvest and showcase your culinary prowess to friends and family.
Cleaning: Preparing the Deer Tenderloin
Properly cleaning the deer tenderloin is essential to eliminate any residual debris and ensure a clean, flavorful bite. Begin by rinsing the tenderloin under cold water, gently rubbing the surface to remove any loose particles. Pat it dry with paper towels, being careful not to bruise or damage the meat.
If you discover any excess silver skin (also known as fascia), it is advisable to remove it. The silver skin can be tough and chewy, detracting from the overall tenderness of the dish. Using a sharp knife, carefully separate the silver skin from the meat, slicing against the grain for optimal results.
Preparation and Seasoning
To transform the deer tenderloin into a culinary masterpiece, it’s time to prepare and season it adequately. The key to enhancing the natural flavors of venison lies in simplicity. Start by seasoning generously with kosher salt and freshly ground black pepper. This minimalist approach allows you to savor the delicate and distinct taste of the meat.
For those seeking more complexity, a dry rub can be created by combining herbs and spices such as garlic powder, rosemary, thyme, and paprika. This aromatic blend will elevate the flavors without overpowering the natural essence of the deer tenderloin.
Tips for Perfectly Cooked Venison
To ensure your deer tenderloin is cooked to perfection, consider the following tips and tricks:
-
Preheat the Oven: Before cooking, preheat your oven to 400°F (200°C) to ensure even cooking and optimal flavor development.
-
Sear the Tenderloin: Start by searing the deer tenderloin on all sides. This initial step helps lock in the juices and achieve a delightful golden-brown crust. Heat a cast-iron skillet over high heat, add a small amount of oil, and sear the tenderloin for approximately 2 minutes per side.
-
Use a Meat Thermometer: Venison, like any type of meat, should reach a safe internal temperature for consumption. For medium-rare doneness, aim for an internal temperature of 135°F (57°C). Inserting a meat thermometer and monitoring the temperature throughout the cooking process ensures precision and perfect results.
-
Resting the Meat: Once the deer tenderloin reaches the desired internal temperature, remove it from the oven and let it rest for a few minutes. Resting allows the meat to redistribute its juices, resulting in a more tender and succulent bite.
Recipe: Deer Tenderloin Oven Delight
Now that you’re equipped with the necessary knowledge, it’s time to embark on the journey of creating a delectable deer tenderloin oven dish. Here’s a step-by-step recipe to guide you along the way:
Ingredients:
-
2 pounds (900 grams) of deer tenderloin
-
Kosher salt and freshly ground black pepper (to taste)
-
Optional: dry rub mixture (garlic powder, rosemary, thyme, paprika)
-
2 tablespoons of olive oil
Instructions:
-
Preheat your oven to 400°F (200°C).
-
Clean the deer tenderloin by rinsing it under cold water and patting it dry with paper towels. Remove any excess silver skin using a sharp knife.
-
Season the tenderloin generously with kosher salt and freshly ground black pepper on all sides.
-
Optional: Apply the dry rub mixture by evenly coating the tenderloin with the spices.
-
Heat a cast-iron skillet over high heat, add olive oil, and sear the deer tenderloin for approximately 2 minutes on each side, or until a golden-brown crust forms.
-
Transfer the skillet with the tenderloin to the preheated oven. Cook for approximately 10-15 minutes, or until the internal temperature reaches 135°F (57°C) for medium-rare doneness.
-
Remove the skillet from the oven and allow the tenderloin to rest for 5-10 minutes.
-
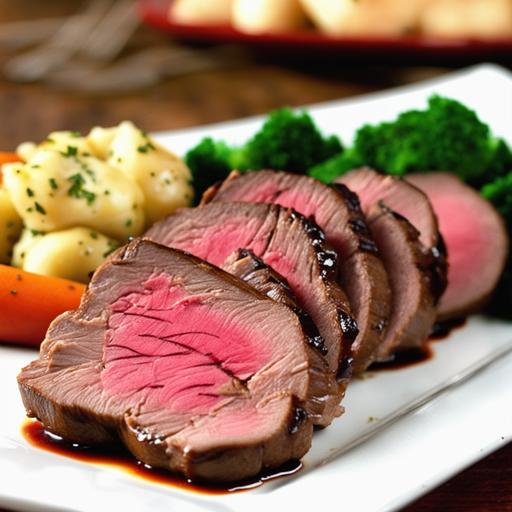
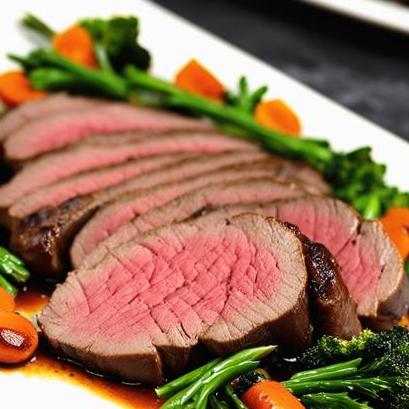
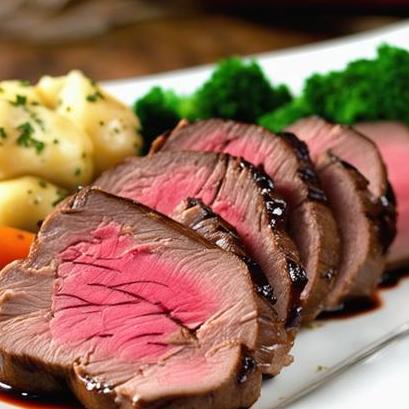
Slice the deer tenderloin against the grain into medallions and serve immediately.
Overcooking and Undercooking: Finding the Balance
While overcooking venison can result in a dry and tough texture, undercooking can lead to a lack of flavor and potential health risks. Achieving the perfect balance is essential to fully appreciate and enjoy the delicate qualities of the deer tenderloin.
To avoid overcooking, it is crucial to monitor the internal temperature throughout the cooking process. Remember, the meat will continue to cook slightly after being removed from the oven, so removing it just before reaching the desired temperature is advisable.
On the other hand, undercooking can present safety concerns, especially if the venison is not sourced from a reliable supplier. Consuming undercooked meat can lead to the transmission of foodborne illnesses. Thus, investing in a good-quality meat thermometer and ensuring the internal temperature is within the safe range is crucial for a pleasurable dining experience.
Variations and Experimentation
The deer tenderloin oven recipe allows for endless variations and experimentation, allowing you to tailor the dish to your personal preferences. Here are a few ideas to spark your culinary creativity:
-
Herb-Marinated Tenderloin: Opt for a herb marinade, combining flavors such as thyme, rosemary, garlic, and olive oil. Let the tenderloin marinate for a few hours or overnight before cooking for enhanced flavor infusion.
-
Bacon-Wrapped Venison: Wrap the deer tenderloin with slices of bacon before searing it. The bacon adds a smoky and indulgent twist to the dish, while also providing an additional layer of moisture.
-
Wild Mushroom Sauce: Accompany your cooked deer tenderloin with a luscious wild mushroom sauce. Sauté a variety of mushrooms, such as porcini or chanterelles, with minced garlic, fresh herbs, and a touch of cream. Spoon the sauce generously over the tenderloin to create a captivating and sophisticated dish.
-
Venison Medallions on a Bed of Creamy Polenta: Serve the deer tenderloin sliced into medallions, atop a comforting bed of creamy polenta. The combination of tender meat and velvety polenta is a match made in culinary heaven.
Remember, cooking is an art that allows you to express your individuality and experiment with flavors. Don’t be afraid to deviate from the traditional recipe and explore new boundaries with your own unique twist.
Final Thoughts
Embarking on the journey of preparing a deer tenderloin oven masterpiece requires patience, attention to detail, and a passion for the culinary arts. By selecting quality venison, properly cleaning and preparing the tenderloin, and following our detailed recipe and tips, you can achieve a delectable, tender, and memorable dish.
While mastering the deer tenderloin oven recipe may take practice, the rewards are well worth the effort. Take this opportunity to delight your taste buds and those of your guests by creating a culinary masterpiece that reflects your hard work, passion, and dedication to the art of cooking.
FAQS On Deer Tenderloin Oven Recipe
What Is Deer Tenderloin?
Deer tenderloin refers to the lean cut of meat taken from the back of the deer, just below the spine. It is considered one of the most tender and highly prized cuts of venison and is often used in gourmet recipes.
How Should I Prepare Deer Tenderloin For Oven Cooking?
To prepare deer tenderloin for oven cooking, begin by trimming off any excess fat or silver skin from the meat. Then, marinate the meat in your preferred blend of seasoning and spices for at least 2 hours to enhance flavor and tenderness.
What Is The Best Oven Temperature For Cooking Deer Tenderloin?
The ideal oven temperature for cooking deer tenderloin is around 350°F to 375°F. This temperature is not too high, so the meat will cook evenly without drying out.
How Long Does It Take To Cook Deer Tenderloin In The Oven?
The cooking time for deer tenderloin in the oven depends on the thickness of the meat and the desired level of doneness. For medium-rare, a 1-inch thick piece of tenderloin should be cooked for about 10-12 minutes while a 1 1/2-inch thick cut will take 15-18 minutes.
What Are Some Tips For Ensuring A Juicy And Flavorful Deer Tenderloin?
To ensure a juicy and flavorful deer tenderloin, it is best to cook it with some moisture in the oven by adding a marinade or sauce to the dish. Additionally, be sure to let the meat rest for at least 5 minutes after cooking to allow the juices to redistribute throughout the meat.