

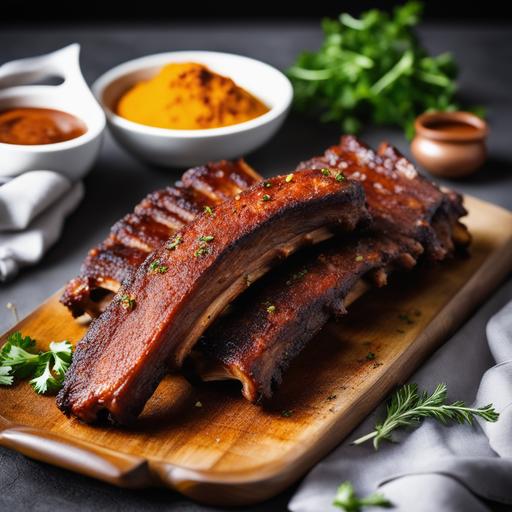
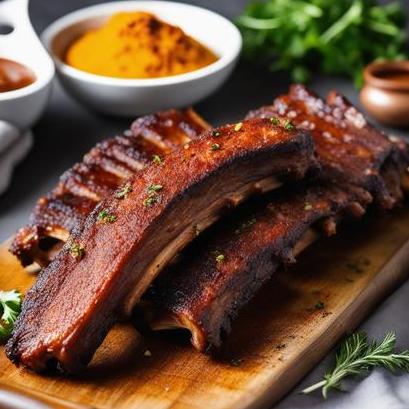
Dry Rub Ribs Oven Recipe: Fall-Off-The-Bone Deliciousness
When it comes to indulging in succulent ribs that practically melt in your mouth, the dry rub ribs baked in the oven stands out as a go-to recipe. This culinary masterpiece brings together tender, flavorful meat and a harmonious blend of spices that will leave your taste buds dancing with joy. In this comprehensive guide, we delve into the science behind this delectable dish, explore the art of selecting the perfect rack of ribs, share cleaning and preparation tips, provide a mouth-watering recipe, and discuss doneness checks to ensure perfection on your plate. So, let’s embark on this savory journey together and unlock the secrets of creating the best dry rub ribs your oven has ever seen!
The Science Behind Succulent Ribs
Before jumping into the nitty-gritty of the recipe, it’s important to understand the culinary science behind achieving tender, fall-off-the-bone ribs. Ribs typically come from tougher cuts of meat that boast a higher amount of collagen, which breaks down during the cooking process, transforming into rich, indulgent gelatin. By slow cooking the ribs in the oven at a low temperature, this collagen is converted into a mouthwatering gelatinous texture that lends both taste and tenderness to the meat. So, without further ado, let’s delve into the journey of preparing these heavenly ribs!
Selecting the Perfect Rack of Ribs
A successful dry rub ribs recipe starts with choosing high-quality ribs. Depending on your taste and availability, you can opt for baby back ribs or spare ribs. Baby back ribs are leaner and smaller, while spare ribs offer a fattier option with more intense flavors. Look for ribs with a vibrant pink color and ample marbling, indicating tenderness and juiciness. Ensure that the meat is fresh, well-packaged, and sourced from a reputable butcher or grocery store. Remember, the quality of the ribs will greatly impact the final result, so don’t compromise on this crucial step.
Cleaning and Preparing the Ribs


Once you’ve acquired your tantalizing rack of ribs, it’s time to embark on the cleaning and preparation process. Follow these steps to ensure your ribs are ready for the dry rub:
-
Rinsing the Ribs: Start by rinsing the rack of ribs under cold water to remove any bone fragments or undesirable debris.
-
Removing the Membrane: Flip the ribs over to the bone side and locate the thin, translucent membrane covering it. To enhance tenderness and allow the flavors to penetrate, it’s crucial to remove this membrane. Begin by loosening the edge of the membrane using a butter knife or your fingers. Once loosened, grip the membrane firmly with a paper towel and peel it off in one swift motion. If you find it troublesome to remove the membrane in one go, you can also make small incisions to release its grip.
-
Patting Dry: After rinsing and removing the membrane, gently pat the ribs dry with paper towels. This helps the dry rub adhere better to the meat and enhances browning during cooking.
Tips and Variations for Flavor Exploration
Dry rub ribs offer a realm of flavor possibilities, allowing you to tailor the taste to your liking. Consider the following tips and variations to unleash your culinary creativity:
-
The Perfect Dry Rub: Experiment with various dry rub combinations to create your signature flavor profile. Common ingredients include brown sugar, paprika, chili powder, black pepper, garlic powder, onion powder, cayenne pepper, and salt. Adjust the ratios based on your preference for sweetness, heat, and smokiness.
-
Marinade Magic: For an extra burst of flavor, marinate the ribs overnight before applying the dry rub. Consider using marinades with ingredients like apple cider vinegar, Worcestershire sauce, soy sauce, honey, or even a touch of whiskey for an added kick.
-
Sweet and Savory Balance: Achieve a harmonious balance of flavors by combining sweet and savory elements in your dry rub. For instance, adding a pinch of cinnamon or a touch of maple syrup can elevate the taste profile, counterbalancing the spice and adding depth to the overall flavor.
Remember, the beauty of dry rub ribs lies in the opportunity to explore and experiment with different flavors. Allow your taste buds to guide you and don’t hesitate to get creative!
Oven Baking: The Magic Happens
Now that you’ve meticulously prepared your ribs and selected a tantalizing dry rub, it’s time to let our trusty oven work its magic. Follow these steps for perfectly baked, finger-licking ribs:
-
Preheating the Oven: Preheat your oven to 275°F (135°C) to ensure even and consistent cooking.
-
Apply the Dry Rub: Generously coat both sides of the ribs with the prepared dry rub, gently massaging it into the meat to ensure full coverage. Let the ribs sit at room temperature for 20-30 minutes to allow the flavors to penetrate before baking.
-
Wrapping in Foil: To create a moist and tender environment during cooking, wrap the seasoned ribs tightly in aluminum foil. Place the ribs, bone side down, on a baking sheet, and loosely cover the entire rack with foil, ensuring a tight seal to preserve moisture.
-
The Slow Cook: Slowly bake the ribs in the preheated oven for approximately 2.5 to 3 hours. This low and slow cooking method ensures the meat becomes tender while allowing the flavors to meld together perfectly. Avoid the temptation to rush the process – patience is key here!
-
Unveil and Glaze: After the initial cooking time, carefully remove the foil, exposing the succulent ribs. At this stage, optionally brush on your favorite barbecue sauce or glaze, allowing it to caramelize during the next step.
-
Browning and Caramelization: Increase the oven temperature to 400°F (200°C) and return the ribs, uncovered, to the oven for an additional 15-20 minutes. This step beautifully caramelizes the glaze and adds a touch of smoky char to the ribs, enhancing the overall taste.
-
Rest before Revelry: Finally, remove the glorious rack of ribs from the oven and let them rest for 10 minutes. This step allows the juices to redistribute, ensuring maximum tenderness when you finally sink your teeth into the meat.
Checking for Doneness: The Key to Perfect Ribs
To ensure your dry rub ribs are cooked to perfection, it’s important to check for doneness. As the cooking time may vary depending on the size of the rack and your oven, utilize these methods for foolproof results:
-
Bend Test: Gently lift one end of the rack using a pair of tongs, allowing the other end to hang. If the meat starts to tear apart as you lift and the rack bends easily, you have achieved the desired tenderness.
-
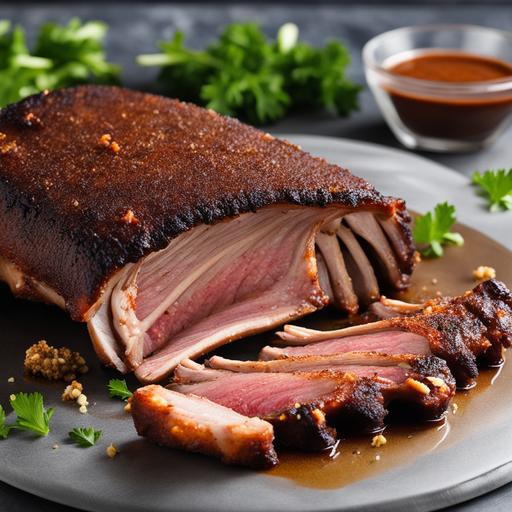
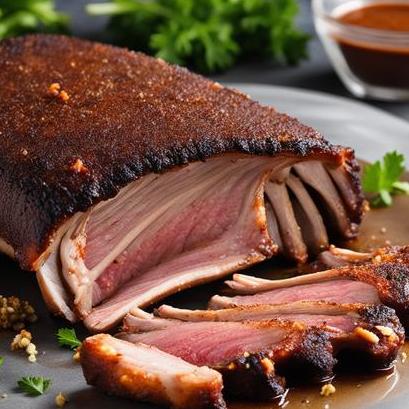
Internal Temperature: For precise doneness, use an instant-read meat thermometer to measure the internal temperature of the meat. The USDA recommends an internal temperature of 145°F (63°C) for pork. Insert the thermometer into the thickest part of the meat, avoiding contact with the bone.
-
The Bone Wiggle: Another indicator of well-cooked ribs is when the meat has shrunk slightly, visibly exposing the bones. As a bonus, try wiggling the bones – they should loosen and come away easily from the meat, a testament to its tenderness.
Remember, cooking times may vary, so it’s essential to rely on these doneness checks rather than following strict time guidelines.
Overcooking or Undercooking: Saving the Day
Despite our best efforts, there may be instances where ribs end up slightly overcooked or undercooked. Fear not, as there are ways to rectify these situations:
-
Overcooked Ribs: If you discover your ribs have become slightly dry or too tender, you can salvage them by brushing on some additional barbecue sauce or glaze and returning them to the oven for 5-10 minutes. This basting will add moisture and rejuvenate the flavor. However, be cautious not to overcook them further.
-
Undercooked Ribs: In the rare event of undercooked ribs, you can still save the day! Simply return them to the oven, either wrapped in foil or tightly covered in a baking dish, and continue cooking at the same low temperature until they reach the desired tenderness. Regularly check for doneness using the techniques mentioned earlier to avoid overcooking.
Remember, even if there are slight mishaps, your dedication, and enthusiasm will still shine through your delicious creation!
A Tangy and Tender Triumph: The Recipe
Now that you have mastered the art of dry rub ribs, let’s dive into a tried and tested recipe that will leave your guests in awe. Get ready to create a tantalizing rack of ribs that will have everyone clamoring for seconds:
Ingredients:
-
1 rack of baby back ribs (approximately 2 to 2.5 pounds)
-
1/4 cup brown sugar
-
2 tablespoons paprika
-
2 tablespoons chili powder
-
1 tablespoon black pepper
-
1 tablespoon garlic powder
-
1 tablespoon onion powder
-
1 teaspoon cayenne pepper
-
1 teaspoon salt
Instructions:
-
Preheat your oven to 275°F (135°C).
-
Rinse the ribs under cold water and pat them dry with paper towels.
-
Remove the thin membrane from the bone side of the ribs.
-
In a bowl, combine the brown sugar, paprika, chili powder, black pepper, garlic powder, onion powder, cayenne pepper, and salt to create the dry rub.
-
Generously coat both sides of the ribs with the dry rub, massaging it into the meat.
-
Let the ribs sit at room temperature for 20-30 minutes to allow the flavors to meld.
-
Wrap the seasoned ribs tightly in aluminum foil, bone side down, and place them on a baking sheet.
-
Bake the wrapped ribs in the preheated oven for approximately 2.5 to 3 hours.
-
Carefully remove the foil, brush on your favorite barbecue sauce or glaze (optional), and increase the oven temperature to 400°F (200°C).
-
Return the uncovered ribs to the oven for an additional 15-20 minutes to caramelize the sauce and add a smoky finish.
-
Remove the ribs from the oven, let them rest for 10 minutes, and then slice and serve.
Conclusion: A Lip-Smacking Journey of Flavor
Congratulations! You have reached the end of this comprehensive guide to crafting the perfect dry rub ribs in the oven. From understanding the science behind succulent ribs to discovering key selection, cleaning, preparation, and cooking techniques, you are now equipped with everything you need to unleash your inner pitmaster. Remember to explore different flavor variations, master the art of doneness checks, and embrace any culinary challenges.
So, gather your apron, roll up your sleeves, and embark on a mouthwatering adventure, transforming humble ribs into a culinary masterpiece that will have everyone begging for your secret recipe. Happy cooking, and may your dry rub ribs always leave a lasting imprint on your taste buds and the hearts of those lucky enough to savor them!
Sources
FAQS On Dry Rub Ribs Oven Recipe
What Exactly Is A Dry Rub, And Why Is It Used In Making Oven-baked Ribs?
A dry rub is a mixture of herbs, spices, and seasonings that is rubbed into the meat to add flavor. In the case of oven-baked ribs, dry rubs are particularly useful because they help create a nice crispy crust on the outside of the meat while keeping the inside juicy and tender.
What Ingredients Are Typically Included In A Dry Rub For Ribs?
The ingredients you include in your dry rub can vary depending on your personal preferences. Some of the most common ingredients include salt, brown sugar, garlic powder, onion powder, cayenne pepper, smoked paprika, and black pepper. You can also experiment with different herbs and spices, such as rosemary or thyme.
How Long Should I Let My Dry Rub Sit On My Ribs Before Cooking Them In The Oven?
While the exact amount of time can vary depending on the specific recipe you are using, many dry rubs benefit from a few hours of sit time to allow the flavors to meld with the meat. Some recipes even recommend letting the rub sit on the meat overnight.
What Temperature Should I Set My Oven To When Cooking Dry-rubbed Ribs?
Again, this can depend on the specific recipe you are using, but most oven-baked rib recipes recommend cooking the ribs at a fairly low temperature (around 250-300°F) for several hours. This slow cooking method helps ensure that the meat stays tender while still allowing the dry rub to create a crispy crust on the outside.
How Can I Tell When My Dry-rubbed Ribs Are Done Cooking In The Oven?
The best way to determine whether your ribs are fully cooked is to use a meat thermometer. Stick the thermometer into the thickest part of the meat (being careful to avoid the bone), and look for a temperature of around 185-190°F. You should also be able to pull the meat apart easily with a fork when it is fully cooked.