Green Chilies Oven Recipe: Unlocking The Flavors Of Spicy Goodness
Is there anything more tempting than the tantalizing aroma of roasted green chilies wafting through your kitchen? When it comes to peppers, green chilies hold a special place in our hearts, adding a kick of heat and a burst of flavor to any dish. In this comprehensive guide, we will delve into the world of green chilies, exploring everything from their culinary history to cleaning, preparation, and an incredibly delicious oven recipe that will leave your taste buds dancing.
The Science Behind Green Chilies
Before we embark on our journey to creating the perfect oven roasted green chilies, let’s take a moment to appreciate the science behind their unique flavor profile. Green chilies contain capsaicin, the compound responsible for their heat. Interestingly, capsaicin triggers the release of endorphins in our brain, resulting in a pleasurable sensation.
Furthermore, the heat of green chilies can vary depending on the cultivar, with Jalapenos offering a milder kick, while Serranos and Thai chilies lean toward the spicier end of the spectrum. The Scoville scale measures the heat of different peppers, and green chilies display a wide range, allowing you to tailor your dishes precisely to your desired level of spiciness.
Selecting the Perfect Green Chilies
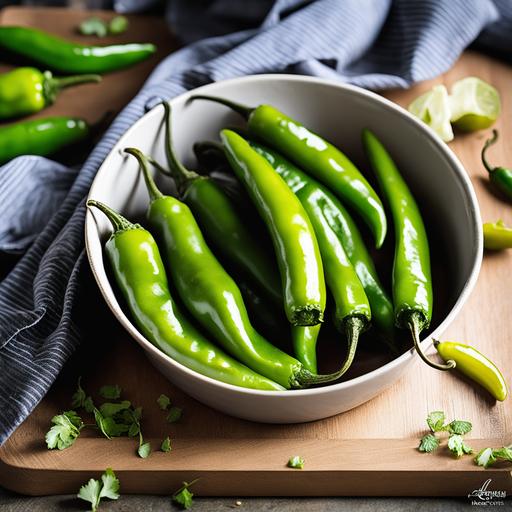
When it comes to selecting green chilies, freshness is key to capturing their vibrant flavor. Head to your local farmers’ market or grocery store and opt for chilies that are bright green, firm, and free from any wrinkles or blemishes. Keep in mind that larger chilies may carry a milder heat, whereas smaller ones tend to pack more punch.
Cleaning and Preparing Green Chilies

Before we dive into the recipe, it’s crucial to know how to handle green chilies safely. When cleaning and preparing them, be sure to protect your hands by wearing gloves. The capsaicin in these chilies can cling to your skin, causing discomfort and irritation.
Starting with the cleaning process, rinse the chilies under cold water to remove any dirt or debris. Gently dry them with a kitchen towel, ensuring they are completely dry before moving on. Once cleaned, it’s time to prepare the chilies for roasting.
Tips for Preparing Green Chilies
To prepare green chilies for roasting, there are a few techniques you can employ to enhance their smoky flavors further:
-
Charring the skin: One popular method involves charring the skin on a stovetop flame. Hold the chili with a pair of tongs, rotating it carefully over the open flame until the skin blisters and turns black. This process infuses the flesh with a delightful smokiness.
-
Broiling: If you don’t have a gas stovetop, don’t fret! You can achieve a similar result by broiling the chilies in your oven. Simply place them on a baking sheet and position it on the top rack of your oven. Keep a close eye on them as they broil, turning them occasionally until the skin blackens.
-
Grilling: Another fantastic option is to grill green chilies over a charcoal or gas grill. This method imparts a unique smoky flavor while adding beautiful grill marks to the flesh. Grill the chilies directly over medium-high heat, turning them until the skin blisters and chars.
Choose the method that best suits your kitchen setup and preferences, as all three techniques yield outstanding results.
Checking for Doneness

Once your green chilies are roasted, it’s important to check for doneness. While you want the skin to be charred, it’s essential to avoid overcooking the flesh. The ideal roasted green chili should have tender flesh with a slight bite and irresistible smokiness.
To test for doneness, gently press the chili with a fork or your fingers. If it feels soft and the skin easily peels away, it’s ready. However, if it feels mushy or falls apart, it may be overcooked.
The Ultimate Green Chilies Oven Recipe
Now, the moment you’ve been waiting for! Let’s dive into a mouthwatering green chilies oven recipe that will elevate your culinary skills to new heights.
Ingredients:
-
6 fresh green chilies
-
2 tablespoons vegetable oil
-
¼ teaspoon salt (adjust to taste)
Instructions:
-
Preheat the Oven: Start by preheating your oven to 425°F (220°C). This high temperature will ensure a quick and even roast for your green chilies.
-
Prep the Chilies: Cleaning and preparing the green chilies, as mentioned earlier, is a prerequisite for this recipe. Ensure they are dry and completely roasted using your preferred method.
-
Prepare the Baking Sheet: Grease a baking sheet with the vegetable oil to prevent the chilies from sticking while adding an extra touch of flavor. Set it aside for now.
-
Seasoning and Roasting: Carefully slit each green chili lengthwise, ensuring the flesh remains intact. This step allows the delicious seasonings to permeate the chili during roasting. Sprinkle salt evenly over the chilies, coating them lightly. Place the chilies on the prepared baking sheet.
-
Roasting the Green Chilies: Slide the baking sheet into the preheated oven and let the chilies roast for approximately 20-25 minutes. Rotate the chilies once or twice during cooking to ensure even roasting.
-
Checking for the Perfect Roast: As mentioned earlier, perform the doneness check by gently pressing the chili with a fork or fingers. If the skin peels away easily, and the flesh is tender yet slightly firm, congrats! Your green chilies are perfectly roasted.
-
Cooling and Storing: Remove the roasted green chilies from the oven and allow them to cool before handling. Once cooled, you can store them in an airtight container in the refrigerator for up to a week, ensuring you have a delightful supply of roasted green chilies whenever the craving strikes.
Variations and Culinary Creativity
While the above recipe offers the perfect foundation for oven roasted green chilies, feel free to unleash your creativity and customize it to suit your personal taste. Here are a few variations and culinary twists to consider:
-
Cheesy Stuffed Green Chilies: Slit the roasted green chilies, remove the seeds, and delicately stuff each chili with your favorite cheese. Place them back in the oven for a few minutes until the cheese melts, creating a harmonious balance between the heat of the chili and the creaminess of the cheese.
-
Green Chilies Salsa: Chop the roasted green chilies, mixed with finely diced onions, tomatoes, cilantro, lime juice, and a touch of salt. This fiery salsa adds a zesty kick to tacos, burritos, or any dish requiring a burst of flavor.
-
Green Chilies Hummus: Blend the roasted green chilies with the traditional chickpea hummus to create a vibrant and spicy dip perfect for crunchy pita bread or vegetable sticks.
Feel free to experiment with different fillings, sauces, and condiments. The only limit is your imagination!
Conclusion
Green chilies oven recipe brings forth a symphony of flavors, enticing your taste buds with smoky heat and incredible versatility. From the selection and preparation to the oven roasting itself, we have explored every detail necessary to create a culinary masterpiece. Remember to handle green chilies with care, check for doneness, and savor the delightful complexities of these fiery peppers.
So, why wait? Roll up your sleeves, find those perfect green chilies, and embark on a gastronomic adventure that will leave you craving for more. Happy cooking!
Sources
FAQS On Green Chilies Oven Recipe
What Is The Best Way To Roast Green Chilies In The Oven?
Preheat your oven to 450°F and place the green chilies on a baking sheet. Drizzle them with a little bit of olive oil and sprinkle with salt. Roast in the oven for about 15-20 minutes, or until the skins are charred and blistered.
Can I Roast Green Chilies Without Oil In The Oven?
Yes, you can roast green chilies in the oven without oil. Simply place the chilies directly on a baking sheet and roast them at 450°F until the skins are charred and blistered.
How Can I Peel The Skin Off Roasted Green Chilies?
After roasting the green chilies, let them cool for a few minutes, then place them in a plastic bag or a bowl covered with plastic wrap to steam. This will help loosen the skins. Once they are cool enough to handle, you can easily peel off the charred skin.
What Can I Use Roasted Green Chilies For?
Roasted green chilies are great for adding a smoky and spicy flavor to a wide variety of dishes. Use them in salsas, soups, stews, and sauces. They are also delicious when added to omelets, tacos, and burgers.
How Long Can I Store Roasted Green Chilies?
Roasted green chilies can be stored in an airtight container in the refrigerator for up to 1 week. They can also be frozen for longer storage. Simply place them in a resealable plastic bag and store them in the freezer for up to 6 months.


