

Breaded Chicken Breast Oven Recipe: A Crunchy Delight That’Ll Make Your Taste Buds Sing!
Breaded chicken breast is an absolute classic when it comes to comfort food. The crispy exterior combined with succulent and juicy chicken makes it a crowd-pleaser every time. In this comprehensive guide, we will explore the science behind achieving the perfect breaded chicken breast, walk you through the culinary details, and provide step-by-step instructions for a mouthwatering oven-baked recipe. So let’s roll up our sleeves and dive into the delectable world of breaded chicken breast!
Food Science: The Secrets Behind a Perfectly Crunchy Breading
To achieve a crispy breading that adheres to the chicken and doesn’t turn soggy, it’s crucial to understand the science behind it. The key players are breadcrumbs, coating, and heat, which work in harmony to create the ideal texture.
1. Breadcrumbs: Choosing the Right Type
Breadcrumbs act as the base for the breading, providing the essential crunch. Traditionally, fresh or panko breadcrumbs are used. Panko, a Japanese style of breadcrumbs, is known for its light and crispy texture. They are perfect for achieving that golden exterior. However, don’t fret if you can’t find panko breadcrumbs, as regular ones work just as well.
2. Coating: Binding the Breading
To ensure a well-adhered breading, a coating is applied to the chicken breast before dipping it into the breadcrumbs. This coating typically consists of flour, eggs, and seasonings. The flour helps create a dry surface for the eggs to cling to, forming a solid base for the breadcrumbs. Additionally, incorporating spices or herbs into the coating will infuse the chicken with delightful flavors.


3. Heat: The Oven’s Magic
When it comes to cooking breaded chicken breast, the oven is your best friend. Baking promotes even cooking and reduces the need for excessive oil. The hot oven air circulates around the chicken, allowing the breading to turn into a beautiful golden brown while ensuring the meat stays juicy and tender.
Culinary Details: Selecting and Cleaning Chicken Breast
Before diving into preparation, it’s essential to choose the right chicken breast and ensure it’s properly cleaned, as these steps significantly influence the final outcome of your dish.
1. Selecting the Perfect Chicken Breast
When selecting chicken breast for this recipe, opt for boneless, skinless cuts. This variant provides an even surface for breading and eliminates the hassle of removing bones or skin. Look for plump and firm cuts, avoiding any with discoloration or an unpleasant odor.
2. Cleaning Chicken Breast
Before getting started, give your chicken breast a thorough rinse in cold water and gently pat it dry using paper towels. This helps remove any potential residue present on the meat. Remember to handle raw chicken with care, following proper hygiene practices to avoid cross-contamination.
Preparation: Getting Ready to Create Culinary Magic
Now that you have your chicken breast ready, it’s time to dive into the preparation process. This section will guide you through preparing the coating, breading, and setting up the cooking station.
1. Preparing the Coating
-
In a shallow bowl, combine all-purpose flour, salt, pepper, and any desired herbs or spices.
-
In a separate bowl, crack open and whisk the eggs until well-beaten.
-
You can also prepare a third bowl with the breadcrumbs, leaving room for mixing in additional seasonings for added depth of flavor.
2. Breading the Chicken Breast
-
Start by dipping the chicken breast into the flour mixture, ensuring an even coating. Shake off any excess flour.
-
Next, dip the chicken into the beaten eggs. Allow any excess egg to drip off.
-
Finally, place the chicken into the breadcrumbs. Gently press the breadcrumbs onto the chicken to ensure an even and generous coating. Flip the chicken over and repeat the process for the other side.
3. Setting Up the Cooking Station
-
Preheat your oven to 400°F (200°C).
-
Prepare a baking sheet by lining it with parchment paper or lightly greasing it with cooking spray.
-
Set up a wire rack on top of the baking sheet. This elevates the chicken breasts, allowing hot air to circulate underneath, ensuring an evenly crispy crust.
Tips and Variations: Elevating Your Breaded Chicken Breast Experience
To take your breaded chicken breast to the next level, consider these expert tips and creative variations. Experimenting with different flavors and cooking methods can provide an exciting twist to your culinary adventure.
1. Tip: Double-Breading for Extra Crunch
For an exceptionally crunchy breading, try double-breading your chicken breasts. After the initial breading process outlined above, dip the chicken back into the egg mixture, followed by another round with breadcrumbs. This method provides an extra layer of crunch and a satisfyingly robust texture.
2. Variation: Flavorful Herb Infusion
Infuse your chicken breast with aromatic herbs to add an extra dimension of flavor. Experiment with herbs like rosemary, thyme, or oregano, either by incorporating them into the flour mixture or mixing them directly into the breadcrumbs. The result will be an herbaceous explosion that tantalizes your taste buds.
3. Variation: Spicy Kick
If you crave a bit of heat, add some spices like cayenne pepper, paprika, or chili powder to your breading mixture. The combination of the crispy outer layer and the spicy seasoning will create a harmonious balance that keeps you coming back for more.
Doneness Check: Ensuring Perfectly Cooked Chicken Breast
Ensuring your chicken breast is cooked to perfection is crucial for both flavor and safety. In this section, we will outline a few methods to check the doneness of your breaded chicken breasts.
1. Internal Temperature
Using an instant-read food thermometer, insert it into the thickest part of the chicken breast. The internal temperature should reach 165°F (74°C). This ensures that any harmful bacteria present in the chicken have been killed, while keeping the meat juicy and tender.
2. Visual Inspection
Cut into the thickest part of one chicken breast to visually check if the meat is opaque throughout. If there is any pinkness remaining or translucent areas, it indicates that the chicken is undercooked and needs a bit more time in the oven.
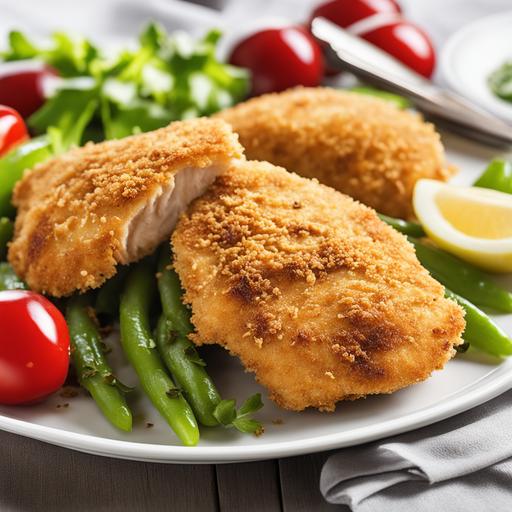
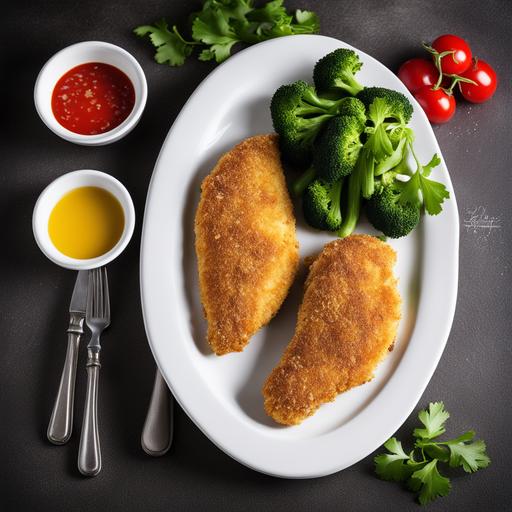
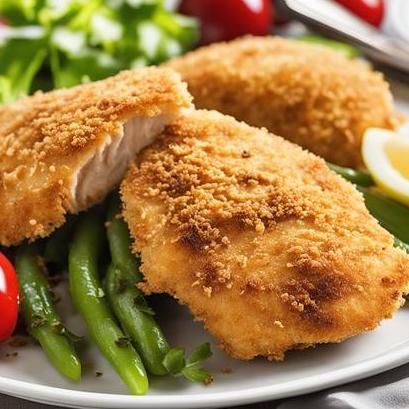
Recipe: Oven-Baked Breaded Chicken Breast
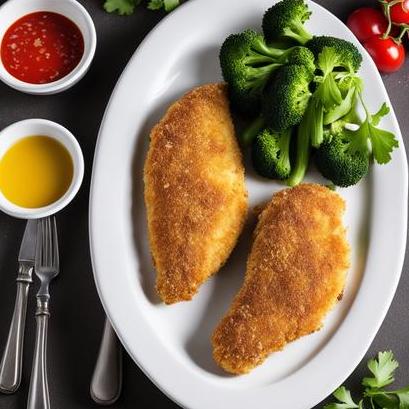
Now that you have mastered the culinary science, followed the preparation steps, and learned various tips and variations, it’s time for the grand finale. Here’s a simple and delicious recipe for oven-baked breaded chicken breast.
Ingredients:
-
4 boneless, skinless chicken breasts
-
1 cup all-purpose flour
-
1 teaspoon salt
-
½ teaspoon black pepper
-
2 eggs, beaten
-
2 cups breadcrumbs (panko or regular)
-
Cooking spray or olive oil for greasing
Instructions:
-
Preheat your oven to 400°F (200°C). Line a baking sheet with parchment paper or lightly grease it with cooking spray.
-
In a shallow bowl, combine all-purpose flour, salt, and black pepper. Mix well.
-
Dip each chicken breast into the flour mixture, making sure to coat both sides evenly. Shake off any excess flour.
-
Next, dip the flour-coated chicken breasts into the beaten eggs, allowing any excess egg to drip off.
-
Finally, coat the chicken breasts with breadcrumbs, pressing gently to ensure an even coating. Flip the chicken and repeat for the other side.
-
Place the breaded chicken breasts on the prepared baking sheet, ensuring they are not touching.
-
Lightly spray the tops of the chicken breasts with cooking spray or drizzle with a small amount of olive oil. This helps them achieve a deep golden color.
-
Bake in the preheated oven for 20-25 minutes, or until the chicken breasts reach an internal temperature of 165°F (74°C) and the breading is golden brown and crispy.
-
Once cooked, remove from the oven and allow the chicken breasts to rest for a few minutes before serving. This helps retain their juiciness.
Avoiding Overcooking or Undercooking
To achieve the perfect level of tender juiciness without overcooking or undercooking, following a few guidelines can make all the difference.
1. Timing
Oven temperatures may vary slightly, so always keep an eye on your breaded chicken breasts. It is best to start checking for doneness after the initial baking time and then monitor them every few minutes until the desired internal temperature is reached.
2. Thickness
The thickness of your chicken breasts can affect cooking time. If you have particularly thick chicken breasts, consider pounding them to an even thickness before breading. This helps ensure even cooking and prevents the outer breading from burning while the inside remains undercooked.
3. Slicing and Checking
If you have doubts about doneness, you can slice into the thickest part of one chicken breast to check if it’s cooked through. If needed, you can return it to the oven briefly until fully cooked.
In Conclusion
Breaded chicken breast cooked to golden perfection is a versatile and delightful dish that never fails to please. In this comprehensive guide, we explored the science behind creating the perfect breading, outlined the culinary details for selecting and cleaning chicken breast, provided step-by-step instructions, useful tips, creative variations, and essential guidelines to ensure your breaded chicken breast is cooked just right.
With this newfound knowledge, gather the ingredients, follow the recipe, and prepare to enjoy your homemade, oven-baked breaded chicken breast. The enticing aroma and satisfying crunch will make your taste buds sing with joy! Bon appétit!
Sources
FAQS On Breaded Chicken Breast Oven Recipe
What Ingredients Do I Need For A Breaded Chicken Breast Oven Recipe?
For this recipe, you will need boneless, skinless chicken breasts, breadcrumbs, flour, eggs, seasoning of your choice, salt, and pepper.
How Do I Make Sure The Chicken Breasts Are Cooked Through?
It is important to use a meat thermometer to ensure that the internal temperature of the chicken breasts reaches 165°F. You can also cut into the thickest part of the breast to check for any pinkness.
Can I Use Different Types Of Breadcrumbs For This Recipe?
Absolutely! You can use panko breadcrumbs, Italian breadcrumbs, or even make your own breadcrumbs by toasting and grinding up stale bread.
What Is The Purpose Of Flour And Eggs In This Recipe?
The flour helps the breadcrumbs adhere to the chicken breasts, while the eggs act as a binding agent to keep the breadcrumbs in place during baking.
How Long Does It Take To Bake Breaded Chicken Breasts In The Oven?
This can vary slightly depending on the thickness of your chicken breasts, but on average, it takes about 20-25 minutes at 400°F to fully cook the chicken. It is always best to use a meat thermometer to ensure they are fully cooked.