
- You are here:
- Home »
- Oven Recipes
- » The Ultimate Squash Seeds Oven Recipe

The Ultimate Squash Seeds Oven Recipe
Introduction:
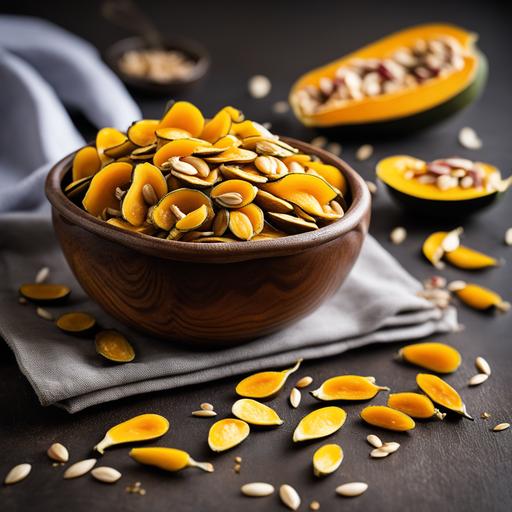
Squash seeds are a highly nutritious and delicious snack that can easily be prepared in your oven. Packed with essential nutrients and a satisfying crunch, roasted squash seeds make a fantastic addition to salads, soups, or simply enjoyed on their own. In this comprehensive guide, we will dive deep into the world of squash seeds, exploring their food science, culinary details, selection, cleaning, preparation, tips, variations, doneness checks, and, of course, our very own irresistible squash seeds oven recipe. So, let’s get started!
Food Science of Squash Seeds:
Understanding the science behind squash seeds can help us appreciate their nutritional value and make better cooking decisions. Squash seeds contain a bounty of essential nutrients such as protein, fiber, healthy fats, vitamins (A, E, and B), and minerals (iron, magnesium, zinc). Additionally, they are an excellent source of antioxidants, promoting overall health and well-being. Consuming squash seeds may enhance digestive health, boost the immune system, and support heart health.
Culinary Details:
When it comes to culinary applications, squash seeds offer a versatile option. They can be used as a garnish, incorporated into baked goods, or used in various dishes to add texture and depth of flavor. The roasting process not only brings out their natural flavors but also transforms their texture, making them a delightful and satisfying snack.


Selection and Cleaning:
To prepare squash seeds, start by selecting a fresh, ripe squash of your choice. Acorn, butternut, or spaghetti squash are recommended due to their larger seeds and abundant flesh. Once you have your squash, cut it open using a sharp knife and scoop out the seeds and pulp using a spoon.
To clean the seeds, place them in a bowl of water and use your hands to separate the seeds from the stringy pulp. The seeds will sink to the bottom while the pulp floats on the surface. Discard the pulp and transfer the seeds to a colander or sieve to remove any remaining pulp or debris. Rinse the seeds under cold running water and pat them dry using a clean kitchen towel or paper towels.
Preparation:
After cleaning the squash seeds, it’s time to prepare them for roasting. Preheat your oven to 325°F (160°C). Line a baking sheet with parchment paper or lightly grease it with cooking spray to prevent sticking.
Spread the cleaned and dried squash seeds evenly on the baking sheet, ensuring they are in a single layer. Note that overcrowding may lead to uneven roasting. For enhanced flavor, you may choose to season the seeds with salt, spices, or herbs of your preference. Common options include sea salt, garlic powder, paprika, cayenne pepper, or a blend of dried herbs like oregano and thyme.
Tips for Perfect Roasted Squash Seeds:
Achieving perfectly roasted squash seeds requires a few key tips and tricks. Here are some recommendations to ensure your seeds turn out crunchy and delicious:
-
Thoroughly dry the seeds before roasting to prevent steaming and ensure a crispy texture.
-
Use high-quality squash seeds for the best results.
-
Experiment with various seasonings to add different flavors and spice levels.
-
Regularly check and stir the seeds during the roasting process to ensure even browning.
-
If you prefer salted seeds, sprinkle salt on them immediately after roasting while they are still warm to allow the salt to adhere better.
Variations:
While roasted squash seeds are delicious on their own, there are several delightful variations you can explore. Consider trying these flavor-packed twists:
-
Sweet and Spicy: Coat the seeds in a mix of honey, cinnamon, and chili powder for a sweet and spicy treat.
-
Smoky Paprika: Toss the seeds with smoked paprika, cumin, and a pinch of cayenne pepper for a smoky flavor profile.
-
Herbaceous Blend: Combine dried herbs like rosemary, thyme, and sage for a fragrant and earthy twist.
-
Savory Garlic Parmesan: Sprinkle the seeds with garlic powder, grated Parmesan cheese, and a touch of salt for an indulgent flavor experience.
Doneness Checks:
During the roasting process, it’s essential to keep a close eye on the squash seeds to ensure they reach their desired level of doneness. Here’s how you can check for doneness:
-
Visual Evaluation: The seeds will turn golden brown and develop a slight crispiness when fully roasted. Keep an eye out for a light golden color and avoid any dark brown or burnt patches.
-
Taste Test: Occasionally remove a cooled seed from the oven and taste it. The seed should have a satisfying crunch and a pleasant nutty flavor. Adjust the cooking time accordingly if needed.
-
Texture Check: Gently press the seeds between your fingers. They should feel dry and brittle without any moisture or softness.
Squash Seeds Oven Recipe:
After exploring the fascinating world of squash seeds, let’s dive into our very own comprehensive recipe for perfectly roasted squash seeds!
Ingredients:
-
2 cups squash seeds
-
1 tablespoon olive oil
-
1 teaspoon sea salt (adjust to taste)
-
Optional: spices or herbs of your choice
Instructions:
-
Preheat your oven to 325°F (160°C) and line a baking sheet with parchment paper or lightly grease it with cooking spray.
-
Clean the squash seeds thoroughly by removing them from the pulp and rinsing them under cold water. Pat them dry using a clean kitchen towel or paper towels.
-
In a bowl, toss the cleaned and dried squash seeds with olive oil, ensuring they are evenly coated.
-
If desired, add the sea salt and any preferred spices or herbs to the seeds. Toss again to distribute the seasonings evenly.
-
Spread the seeds in a single layer on the prepared baking sheet, ensuring they are evenly spaced.
-
Place the baking sheet in the preheated oven and roast the seeds for about 15-20 minutes, or until they turn golden brown, stirring occasionally.
-
Once roasted, remove the baking sheet from the oven and allow the seeds to cool completely.
-
Enjoy your homemade roasted squash seeds as a snack, a flavorful topping for dishes, or use them to add crunch to your favorite recipes.
Conclusion:
Congratulations! You have now embarked on a fascinating journey into the world of squash seeds and their delightful oven recipe. By following the food science, culinary details, selection, cleaning, preparation, tips, variations, and doneness checks presented in this comprehensive guide, you are well-equipped to create mouthwatering roasted squash seeds right in your own kitchen. Embrace your creativity and experiment with an array of flavors to tantalize your taste buds. So, grab some squash seeds, fire up your oven, and savor the rich nuttiness and crunch of these irresistible treats!
Sources
FAQS On Squash Seeds Oven Recipe
What Are The Ingredients Needed For A Squash Seeds Oven Recipe?
To make a delicious squash seeds recipe, you will need the following ingredients:
- Squash seeds: Make sure to remove them from the squash and clean them thoroughly.
- Olive oil: This will help in roasting the seeds and add a hint of flavor.
- Salt: A sprinkle of salt will enhance the taste of the seeds.
- Optional seasonings: You can add various seasonings such as garlic powder, paprika, or cayenne pepper to add extra flavor and spice to your roasted squash seeds.
How Do I Clean Squash Seeds Before Roasting Them In The Oven?
Cleaning squash seeds before roasting is essential to ensure their proper texture and taste. Start by scooping out the seeds from the squash’s center. Separate the seeds from the pulp and place them in a colander. Rinse the seeds under cool running water, gently rubbing them between your fingers to remove any remaining squash pulp. Once clean, pat them dry with a clean kitchen towel or paper towel.
Can I Roast The Squash Seeds With The Squash Flesh Still Attached?
It is recommended to remove the squash flesh before roasting the seeds. The flesh tends to release moisture during the roasting process, making it difficult for the seeds to crisp up evenly. Removing the flesh ensures that the seeds will roast uniformly and become crispy and golden brown.
How Long Should I Roast Squash Seeds In The Oven?
Preheat your oven to 325°F (165°C). Spread the cleaned and dried squash seeds in a single layer on a baking sheet. Drizzle them with olive oil and sprinkle with salt and any desired seasonings. Roast the seeds for approximately 15-20 minutes, or until they turn golden brown, stirring occasionally for even roasting. Keep a close eye on them to avoid burning.
How Can I Store Roasted Squash Seeds For Later Use?
Once the roasted squash seeds have cooled completely, transfer them to an airtight container to maintain their freshness. They can be stored at room temperature for up to two weeks. For longer shelf life, consider storing them in the refrigerator or freezer, where they can last for months.