

The Ultimate Tuna Melts Oven Recipe: A Savory Delight For Seafood Lovers
Are you a seafood enthusiast searching for a mouthwatering and nutritious meal? Look no further! This comprehensive and in-depth article will guide you through the tantalizing world of tuna melts, focusing on the oven-baked variety. Prepare to tantalize your taste buds with every bite of this delectable dish that combines the richness of tuna with the gooey goodness of melted cheese.
Introduction: Unraveling the Tuna Melt Magic
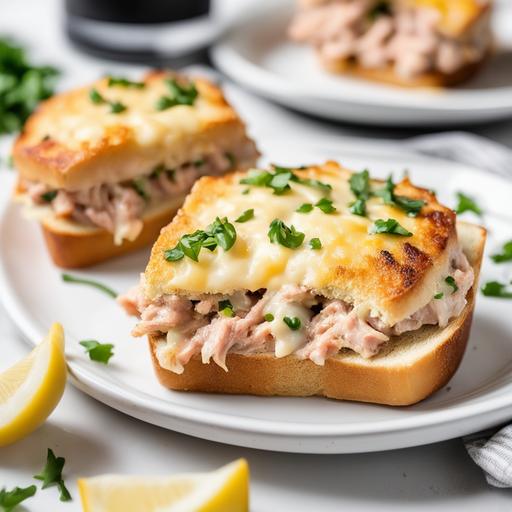
Tuna melts are a classic comfort food that has gained popularity worldwide. Picture warm, flaky bread enveloping a luscious blend of tuna, mayonnaise, and spices, topped off with a blanket of melted cheese. The tuna melt doesn’t merely satisfy our cravings; it provides a substantial source of protein, omega-3 fatty acids, and essential vitamins.
In this article, we will delve into the world of tuna melts, uncovering the food science behind their creation, guiding you through the culinary details, selecting the perfect ingredients, understanding the cleaning process, preparing the medley, sharing invaluable tips, exploring variations and doneness checks, and ultimately presenting a tantalizing recipe that will leave you craving more.
Food Science: Understanding the Chemistry of a Perfect Tuna Melt
Creating the perfect tuna melt involves understanding the science behind flavor and texture. Each element of this delightful dish plays a crucial role in achieving the perfect balance.


1. Tuna Selection: Freshness is Key
To ensure optimum flavor and quality in your tuna melt, choosing fresh, sustainably sourced tuna is crucial. Opt for tuna steaks or fresh tuna from reliable sources. Canned tuna, though convenient, can sometimes lack the desired texture and robust flavor.
2. Cheese Matters: Melting the Right Way
The cheese used in a tuna melt should be one that melts effortlessly, forming a luscious layer over the tuna filling. Ideal cheese choices include Cheddar, Swiss, Gruyère, or Monterey Jack. These cheeses possess a perfect balance of flavor and melting capability, adding a delightful creaminess to the dish.
3. Bread Selection: Crafting the Perfect Foundation
The bread for a tuna melt should complement and enhance the overall dish. Opt for varieties such as sourdough, ciabatta, or thickly sliced rye that can hold their shape and withstand the melting cheese and tuna filling without becoming soggy.
Culinary Details: From Ingredient Preparation to Oven Efficiencies
Now that we understand the science behind a delicious tuna melt, let’s dive into every culinary detail necessary to achieve perfection in a hot oven.
1. Cleaning and Prepping the Ingredients
Before embarking on your tuna melt journey, ensure all your ingredients are properly cleaned and prepped. Thoroughly rinse fresh tuna steaks, removing any bones or skin. If using canned tuna, drain it well to avoid a watery final product. Additionally, shred or grate the cheese of your choice, and slice your bread into thick, evenly-sized pieces.
2. Preheating the Oven: The Foundation of Baking
Preheating your oven ensures even cooking and ideal heat distribution throughout the baking process. Preheat your oven to 375°F (190°C) for that perfect golden brown finish.
3. Assembling the Tuna Melt: Artistry in Layers
Creating the ideal tuna melt involves artfully layering each component. Begin by generously spreading mayonnaise, flavored with mustard or lemon zest, on each slice of bread. Next, arrange a portion of tuna salad on top of the mayonnaise-coated bread. Add slices of tomato and lettuce for a fresh twist if desired. Finish by placing a generous amount of shredded or sliced cheese on top.
4. Baking to Perfection: Timing is Everything
Place the assembled tuna melts on a baking sheet lined with parchment paper or a silicon mat. Bake in the preheated oven for approximately 10-12 minutes, or until the cheese is melted and bubbly, with a golden-brown crust. Be cautious not to overcook, as this may result in a dried-out or excessively browned dish.
5. Broiling for Extra Crispiness: A Flavorful Finish
For an extra touch of caramelization and crispiness, switch on the broiler for the last 2 minutes of baking. Keep a close eye on the oven to prevent burning, as broiling can be a rapid and intense process.
Tips and Variations: Elevating Your Tuna Melt Experience
Now that you have mastered the fundamentals of tuna melt preparation, let’s explore some tips and variations to add flair and creativity to your dish.
1. Flavorful Additions: Elevating the Tuna Salad
Enhance the flavor profile of your tuna salad by adding ingredients like diced red onions, capers, chopped dill pickles, or jalapeños for a spicy kick. Experiment with herbs like dill, parsley, or basil to awaken your taste buds.
2. Spreading Sensations: Exploring Mayo Alternatives
While traditional tuna melts use mayonnaise as a base, consider incorporating alternatives such as sour cream, Greek yogurt, or avocado. These substitutions offer a unique twist, adding creaminess and tanginess.
3. Cheesy Delights: Mixing Up the Melts
Expand your cheese horizons by including a blend of different varieties, such as mozzarella and Parmesan. Experiment with smoked cheeses or even blue cheese for an adventurous twist.
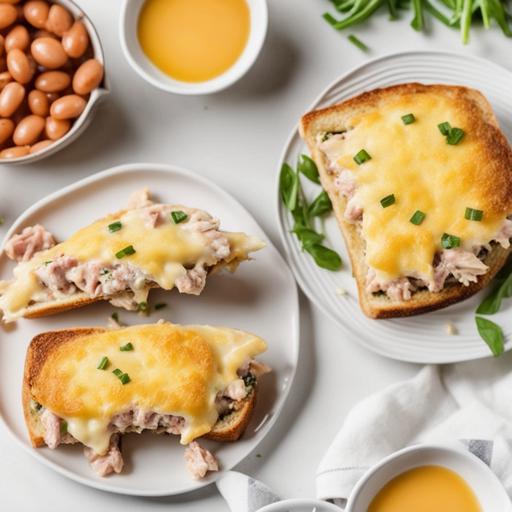
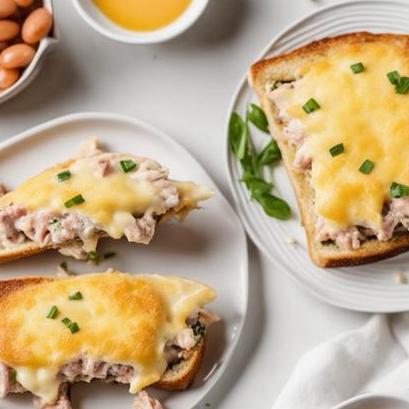
4. Accompaniments and Dips: The Perfect Pairings
Serve your tuna melts with a side of crispy sweet potato fries, homemade pickles, or a zesty coleslaw. These refreshing and complementary accompaniments will take your meal to the next level.
Doneness Checks: Ensuring a Perfectly Cooked Tuna Melt
Checking for the doneness of your tuna melt requires a careful eye and attention to detail. Here are a few indicators that your masterpiece is perfectly cooked:
-
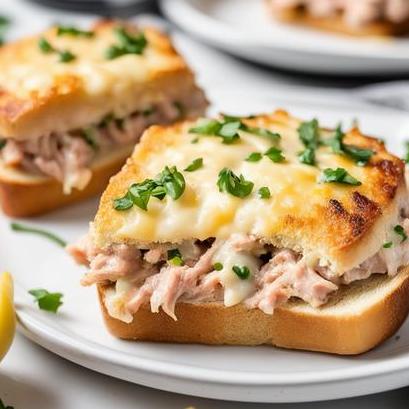
The cheese should be uniformly melted and ooze around the edges, providing a golden-brown hue.
-
The bread should toast lightly, resulting in a crunchy exterior but still maintain a tender crumb.
-
The tuna filling should be heated through, ensuring it is warm but still moist and succulent.
The Recipe: A Step-by-Step Guide to the Perfect Tuna Melt
Finally, the moment you’ve been waiting for! Here is a step-by-step recipe to help you create an unforgettable tuna melt experience.
Ingredients:
-
2 fresh tuna steaks (or 2 cans of tuna, drained)
-
1/4 cup mayonnaise
-
1 tablespoon Dijon mustard
-
4 slices sourdough bread
-
4 slices Cheddar cheese
-
Tomato slices (optional)
-
Lettuce leaves (optional)
-
Salt and pepper to taste
Instructions:
-
Preheat your oven to 375°F (190°C).
-
If using fresh tuna steaks, season them with salt and pepper. Grill or sear the steaks over medium-high heat until cooked to your desired level of doneness. Allow the tuna to cool slightly before flaking it with a fork.
-
In a bowl, combine the flaked tuna, mayonnaise, and Dijon mustard. Mix well until all ingredients are thoroughly combined. Season with salt and pepper to taste.
-
Lay out the sourdough bread slices on a baking sheet lined with parchment paper.
-
Spread a generous layer of the tuna mixture on each slice of bread. If desired, add tomato slices and lettuce leaves for an extra layer of flavor.
-
Top each tuna-covered bread slice with a slice of Cheddar cheese.
-
Place the baking sheet in the preheated oven and bake for 10-12 minutes or until the cheese is melted and bubbly, with a golden-brown crust.
-
For an extra touch of crispiness, switch on the broiler for the last 2 minutes of baking. Keep a close eye on the oven to prevent burning.
-
Remove the tuna melts from the oven and allow them to cool for a few minutes before serving. This will prevent any premature oozing of the fillings.
-
Serve your freshly baked tuna melts with your desired accompaniments and enjoy!
Conclusion: A Symphony of Flavors in Every Bite
Congratulations! You have skillfully ventured into the realm of tuna melts, unraveling their wonders in this extensive article. Armed with a solid understanding of the food science, culinary details, selection, cleaning, preparation, tips, variations, and doneness checks, you are now ready to embark on a tantalizing journey that will delight your taste buds and impress your friends and family.
Remember, the beauty of a tuna melt lies in its versatility. Feel free to experiment with the ingredients, flavors, and accompaniments. This dish is an open canvas, eagerly waiting for your touch of creativity.
So, gather your ingredients, preheat your oven, and prepare to savor each bite of the ultimate tuna melt – a symphony of flavors that seamlessly marries the ocean’s bounty with the comforting warmth of melted cheese.
Sources
FAQS On Tuna Melts Oven Recipe
Can I Use Any Type Of Bread For A Tuna Melt?
Yes, you can use any type of bread for a tuna melt, such as white, wheat, sourdough, or rye. Just make sure the bread is sturdy enough to hold the fillings and won’t become soggy when baked in the oven.
How Do I Make The Tuna Filling For The Melt?
To make the tuna filling, mix together drained canned tuna, mayonnaise, minced onion, chopped pickles, and any other desired seasonings. This will serve as the delicious base for your tuna melt.
Can I Use Fresh Tuna Instead Of Canned For This Recipe?
Absolutely! You can use fresh tuna steak that has been cooked and flaked into small pieces for a more gourmet twist on the classic tuna melt. Just make sure to adjust the cooking time accordingly to ensure the tuna doesn’t dry out in the oven.
Do I Need To Preheat The Oven Before Making The Tuna Melts?
Yes, preheating the oven is an important step in ensuring that the tuna melts cook evenly and properly. Preheat your oven to 375°F before assembling the melts.
How Can I Customize The Toppings For My Tuna Melt?
The options for customizing tuna melt toppings are endless! Some popular additions include sliced tomato, avocado, bacon, and different types of cheese like cheddar or provolone. You can also sprinkle some herbs or spices on top for added flavor. Get creative and make it your own!