The Ultimate Corn Oven Recipe: A Comprehensive Guide To Corn-Licious Delights
Corn is one of nature’s most versatile and delicious gifts to mankind. Whether roasted on an open fire or boiled on the stovetop, nothing beats the sweet, juicy kernels bursting with flavors. But have you ever considered the wonders that can be achieved by cooking corn in an oven? In this comprehensive guide, we delve into everything you need to know about the corn oven recipe – from food science and culinary details to selection, preparation, and tips for perfecting your corn dishes. So grab your apron, preheat your oven, and let’s embark on this corn-licious journey together!
Food Science: Understanding the Magic Behind the Corn Oven Recipe
Before delving into the nuances of cooking corn in an oven, it’s essential to understand the food science behind it. Corn is mainly composed of water and carbohydrates, with a sugar content that converts to starch as it matures. When exposed to heat, the starch breaks down into simple sugars, enhancing the natural sweetness and creating that signature caramelization. The oven provides a controlled environment where the heat surrounds the corn evenly, resulting in a tender yet crisp texture that delights the taste buds.
Culinary Details: Selecting the Perfect Corn
Selecting the right corn is paramount to achieving mouthwatering results. Here are a few pointers to keep in mind when choosing corn for your oven recipe:
-
Freshness: Look for corn with bright green husks that feel plump and tightly wrapped around the ears. Avoid corn with dried-out or brown husks, as it indicates maturity and will impact the sweetness and tenderness of the corn.
-
Kernels: Gently peel back a small section of the husk to examine the kernels. They should be plump, juicy, and tightly arranged in even rows. Avoid corn with shriveled or discolored kernels.
-
Variety: While there are countless corn varieties available, some popular choices for oven cooking include Sweet Yellow, White, or Bi-colored varieties like Butter and Sugar or Silver Queen. Experiment with different varieties to find your favorite flavor profile.
-
Organic vs. Conventional: Opting for organic corn ensures that you’re enjoying a product free from synthetic pesticides and fertilizers. However, conventional corn can still yield delicious results if handled with care during cleaning and preparation.
Cleaning: Unearthing the Beauty Within

Before you can unlock the corn’s full potential, it’s crucial to clean it properly. Follow these steps for squeaky-clean corn:
-
Husk Removal: Gently peel back the corn husks, exposing the kernels beneath. Remove any loose or excess husk, taking care not to detach the husk entirely.
-
Silk Removal: Once the husks are partially removed, you’ll find silky threads called corn silk. Grab the silk at the tip of the corn and peel it downward, removing as much silk as possible. Rinse the corn under cool water to remove any remaining silk.
-
Husk Replacement: After cleaning the corn, carefully reposition the husks to cover the corn once more. This step helps retain moisture during the oven cooking process.
Preparation: Getting Ready for Corn Oven Magic
Now that your corn is clean and prepped, it’s time to prepare it for the oven. Follow these essential steps:
-
Soaking: To prevent dryness and promote even cooking, soak the corn in water for 10-15 minutes. This step ensures that the corn retains its moisture and tenderness during the oven cooking process.
-
Seasoning: While corn is delicious in its natural state, experimenting with seasonings can elevate its flavors to new heights. Consider brushing the corn with melted butter, sprinkling it with salt and pepper, or even adding a pinch of herbs or spices to suit your taste preferences.
Tips and Tricks: Elevating Your Corn Oven Skills
To truly master the corn oven recipe, consider these tips and tricks for corn-licious success:
-
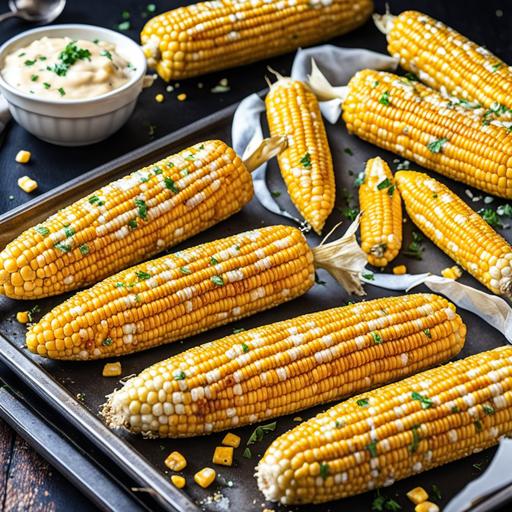
Temperature and Timing: Preheat your oven to 400°F (200°C) for conventional ovens or 375°F (190°C) for convection ovens. Arrange the corn on a baking sheet lined with parchment paper, leaving some space between each ear. Bake for 20-25 minutes, rotating the corn halfway through cooking for even browning.
-
Enhancing Flavor: Get creative by adding various toppings or glazes to your corn before baking. Consider brushing the fresh corn with honey, lime juice, or your favorite barbecue sauce for a tantalizing twist.
-
Foil Packets: Wrapping individual corn ears in foil packets with a pat of butter and your desired seasoning can yield incredibly flavorful and tender results. These packets can be placed directly on the oven rack or baking sheet.
-
Grilled Corn: A Match Made in Heaven: For those that crave the smoky goodness of grilled corn, consider pre-roasting the corn in the oven and finishing it off on a hot grill for a few minutes. This combination of techniques provides a delectable blend of flavors and textures.
-
Leftover Makeovers: If you happen to have any leftover roasted corn, remove the kernels from the cob and use them in dishes like salads, salsas, or even omelets. This way, nothing goes to waste, and you can enjoy the magic of corn in various culinary creations.
Doneness Checks: Ensuring Perfection Every Time

Determining the doneness of corn can be a subjective process. However, a few indicators can help you achieve that perfect balance between tender and crisp:
-
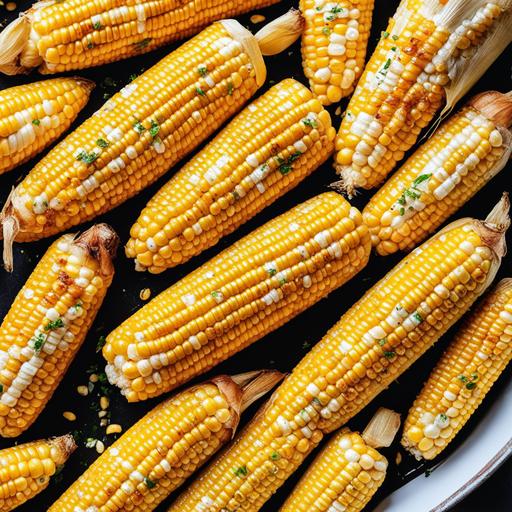
Color: Roasted corn should showcase an enticing golden or slightly charred appearance.
-
Kernels: Gently pierce a kernel with a fork or your fingernail. If it offers little to no resistance and releases a milky substance, it’s a sure sign of a perfectly cooked ear of corn. Be careful not to overcook, though, as it can lead to mushy kernels.
-
Texture: Bite into a kernel and assess its texture. A harmonious combination of juiciness and crispness indicates an expertly roasted corn ear.
Recipe: The Corn Oven Masterpiece
Finally, the moment you’ve been waiting for – the corn oven recipe itself. Get ready to venture into the land of culinary bliss with this tried-and-true recipe:
Ingredients:
-
4-6 ears of fresh corn
-
2 tablespoons melted butter
-
Salt and pepper to taste
Instructions:
-
Preheat your oven to 400°F (200°C).
-
Clean and soak the corn as described earlier.
-
Lightly brush the corn with melted butter, evenly coating each ear.
-
Season with salt and pepper to taste.
-
Place the corn on a baking sheet lined with parchment paper, leaving space between each ear.
-
Bake for 20-25 minutes, rotating the corn halfway through cooking.
-
Remove from the oven and let it cool slightly before serving.
Overcook or Undercook: Dealing with Mishaps
Even with the most detailed instructions, mishaps happen. If you find yourself with overcooked or undercooked corn, here are a few quick solutions:
-
Overcooked: If the corn appears overly charred or has become mushy, don’t despair. Cut the kernels off the cob and repurpose them in dips, fritters, or cornbread recipes.
-
Undercooked: In case the corn is slightly undercooked, return it to the oven for an additional 5-10 minutes until it reaches the desired doneness. Keep a close eye on it to avoid overcooking.
Conclusion
Congratulations, you’ve reached the end of our comprehensive guide to the corn oven recipe! Armed with an understanding of food science, culinary techniques, tips, and an enticing recipe, you are now ready to embark on a corn-licious journey of your own. Experiment with different varieties, seasonings, and cooking methods to uncover your favorite way to enjoy the glorious flavors of roasted corn. So, preheat that oven, bring out the parchment paper, and let your taste buds dance to the melody of corn perfection. Happy cooking!
Sources
FAQS On Corn Oven Recipe
What Is A Corn Oven Recipe?
A corn oven recipe is a dish made using an oven and corn. This recipe is perfect for those who love a crispy and delicious corn dish.
What Are The Key Ingredients Of A Corn Oven Recipe?
The key ingredients of a corn oven recipe are corn cobs, butter, garlic, salt, pepper, and parmesan cheese. These ingredients work together to create a scrumptious and mouth-watering dish.
How Do I Prepare Corn Cobs For A Corn Oven Recipe?
First, clean and wash the corn cobs thoroughly. Then, mix melted butter, garlic, salt, and pepper in a bowl. Brush the mixture over the corn cobs, making sure that every cob is evenly coated. Finally, sprinkle parmesan cheese on top of the corn cobs before placing them inside the oven.
How Long Should I Cook My Corn Oven Recipe?
Preheat your oven to 375°F (190°C) and cook the corn cobs for around 25-30 minutes, or until the corn is tender and the cheese is melted and golden-brown.
What Are Some Variations Of A Corn Oven Recipe?
You can add your own twist to the recipe by adding different spices like cumin or chili powder. You can also try using different types of cheese, or adding chopped herbs like parsley or thyme to elevate the overall flavor of the dish.


