

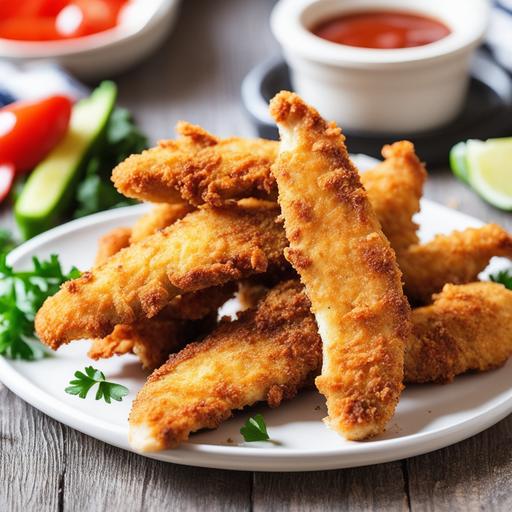
The Ultimate Chicken Fingers Oven Recipe: Crispy, Tender, And Absolutely Delicious!
If you’re looking for a quick and easy meal that the whole family will love, look no further than chicken fingers. These tasty strips of chicken are incredibly versatile, perfect for dipping, and can be enjoyed by both kids and adults alike. In this comprehensive guide, we will dive deep into every aspect of making the perfect chicken fingers in the oven. From selection to cleaning, preparation to variations, and even tips for achieving the perfect level of doneness, we’ll cover it all.
The Science behind Perfectly Cooked Chicken Fingers
Before we jump into the culinary details, it’s important to understand the science behind cooking chicken fingers to perfection. Chicken fingers, also known as chicken tenders or chicken strips, are boneless, skinless chicken breast meat. To achieve that ideal crispy texture on the outside while keeping the inside tender and juicy, we need to consider a few key factors.
-
Protein Denaturation: As the chicken cooks, the proteins in the meat denature, causing the meat to firm up and change texture. This is why it’s crucial not to overcook the chicken fingers, as they can become dry and tough.
-
Maillard Reaction: The Maillard reaction is responsible for the golden brown color and delicious aroma of cooked foods. This reaction occurs when amino acids and reducing sugars react at high temperatures, resulting in a complex cascade of flavors and the desirable crispy crust on the chicken fingers.
Now that we understand the science behind chicken fingers let’s dive into the culinary details.
Selecting the Perfect Chicken
To ensure the best possible result, start by selecting high-quality chicken breast meat. Look for boneless, skinless chicken breasts that are plump, firm, and free from any discoloration. Fresh chicken is always preferable, but if you have frozen chicken, make sure it is completely thawed before cooking to ensure even cooking and to avoid any moisture loss.


Cleaning and Preparing the Chicken
Once you have chosen your chicken, it’s time to clean and prepare it. Start by rinsing the chicken fingers under cold water to remove any residue. Pat them dry with paper towels, being careful to remove any excess moisture. By removing excess moisture, we promote better browning and avoid steaming the chicken fingers in the oven.
Seasoning and Marinating Options
One of the great things about chicken fingers is their ability to take on various flavors. Here are a few seasoning and marinade options to consider:
-
Classic Seasoning: For a simple yet tasty option, season the chicken fingers with salt, pepper, garlic powder, and paprika.
-
Buttermilk Marinade: Marinading the chicken fingers in buttermilk before baking adds tanginess and ensures incredible tenderness. Combine buttermilk, salt, pepper, and your choice of additional herbs and spices in a bowl, then place the chicken fingers in the marinade and refrigerate for at least 1 hour, or overnight for maximum flavor.
-
Spicy Kick: If you enjoy a bit of heat, add cayenne pepper, chili powder, or hot sauce to your seasoning mix. This option is sure to add a spicy kick to your chicken fingers.
Remember to let the chicken marinate for a sufficient amount of time to allow the flavors to penetrate the meat fully.
Tips for Achieving Crispy Perfection

To ensure your chicken fingers come out crispy, tender, and irresistible, keep these tips in mind:
-
Panko Breadcrumb Coating: For an extra crispy coating, use panko breadcrumbs instead of regular breadcrumbs. Panko breadcrumbs are coarser, resulting in a lighter and airier texture.
-
Double Dredging: For an even thicker and crunchier coating, consider double dredging your chicken fingers. After dipping them in egg or buttermilk, coat them in breadcrumbs once more before baking.
-
Preheating the Baking Sheet: Preheating the baking sheet in the oven before adding the chicken fingers can help achieve a more evenly browned crust.
Now that we’ve covered the preparation and tips, let’s move on to the actual cooking process.
The Ultimate Chicken Fingers Oven Recipe
Ingredients:
-
1 lb boneless, skinless chicken breasts, cut into finger-sized strips
-
1 cup panko breadcrumbs
-
1/2 cup all-purpose flour
-
2 eggs, beaten
-
Salt and pepper to taste
-
Optional: choice of spices, herbs, or seasonings
Instructions:
Follow these steps to create perfectly crispy chicken fingers:
-
Preheat your oven to 425°F (220°C).
-
Prepare a baking sheet by lining it with parchment paper or greasing it lightly with cooking spray.
-
In separate bowls, set up a breading station. Place the flour in one bowl, beaten eggs in another, and the panko breadcrumbs in a third. Season each with your choice of herbs and spices.
-
Begin by coating each chicken finger with flour, shaking off any excess.
-
Dip the floured chicken finger into the beaten eggs, making sure to coat it entirely.
-
Transfer the chicken finger into the panko breadcrumb mixture, pressing lightly to adhere the breadcrumbs to the chicken.
-
Place the breaded chicken fingers onto the prepared baking sheet, leaving some space between each piece for even cooking.
-
Bake the chicken fingers in the preheated oven for 15-18 minutes, or until they reach an internal temperature of 165°F (74°C).
-
Once cooked, remove the chicken fingers from the oven and let them rest for a few minutes before serving.
Checking for Doneness
It’s important to ensure your chicken fingers are cooked thoroughly before serving. Here are a few methods to check for doneness:
-
Thermometer: Using an instant-read meat thermometer, insert it into the thickest part of the chicken finger. The temperature should reach 165°F (74°C) for the chicken to be fully cooked.
-
Visual Inspection: Cut into the thickest part of the chicken finger to ensure there is no pinkness or rawness remaining.
Always remember that chicken can quickly dry out if overcooked, so strive for that perfect balance of tenderness and doneness.
Variations to Spice Up Your Chicken Fingers
Now that you have mastered the classic chicken fingers recipe, let’s explore a few variations to satisfy different taste preferences:
-
Parmesan Crusted: Add grated Parmesan cheese to the panko breadcrumb mixture to create a flavorful and cheesy coating.
-
Honey Mustard Glazed: Brush the chicken fingers with a mixture of honey and Dijon mustard before baking. The glaze will caramelize, adding a sweet and tangy twist.
-
Buffalo Style: Toss the cooked chicken fingers in your favorite buffalo wing sauce for a spicy kick. Serve with blue cheese or ranch dressing for dipping.
Feel free to experiment with various spices, herbs, or even different coatings such as crushed cornflakes or finely chopped nuts for added texture and flavor.
Overcooking and Undercooking Prevention
Encountering overcooked or undercooked chicken fingers can be disappointing, but with a few precautions, you can avoid these pitfalls.
-
Overcooking: To prevent overcooking, monitor the cooking time closely and rely on a digital meat thermometer for accuracy. Remember that the internal temperature should reach 165°F (74°C) for perfectly cooked chicken fingers.
-
Undercooking: Ensure that the chicken fingers are thoroughly cooked by cutting into the thickest part to check for any signs of rawness or pinkness. If needed, extend the cooking time slightly until perfection is achieved.
By following these guidelines, you’ll be well on your way to becoming a master of chicken fingers in the oven.
Enjoy Your Homemade Chicken Fingers!
Congratulations! You have now embarked on a culinary journey that will leave your taste buds and those of your loved ones fully satisfied. With this comprehensive guide by your side, you’re armed with the knowledge and techniques necessary to create the ultimate chicken fingers in your very own oven. Remember to get creative with variations and flavors while always striving for that perfect balance of crispy exterior and moist, tender chicken inside. So go ahead, gather your ingredients, and enjoy the delightful experience of homemade chicken fingers that are irresistibly delicious!
Sources
FAQS On Chicken Fingers Oven Recipe
What Temperature Should I Preheat My Oven When Making Chicken Fingers?
It is recommended to preheat your oven to 400°F (204°C) for the ideal cooking temperature.
How Long Should I Cook Chicken Fingers In The Oven?
Chicken fingers should be baked for approximately 20-25 minutes or until they are golden brown and crispy. The actual cooking time may vary depending on the thickness and size of the chicken pieces.
How Do I Make Sure My Chicken Fingers Are Juicy And Flavorful?
One way to ensure juicy and flavorful chicken fingers is to marinate them in your preferred seasoning mix for at least 30 minutes before cooking. This will enhance the flavor and tenderize the meat.
Can I Use A Baking Sheet Or Should I Use A Baking Rack When Cooking Chicken Fingers In The Oven?
While both methods work, using a wire rack on top of a baking sheet would provide better air circulation and prevent the chicken from getting soggy on the bottom.
How Do I Know When My Chicken Fingers Are Fully Cooked And Safe To Eat?
One way to determine if the chicken is fully cooked is by using a meat thermometer to check the internal temperature. The chicken should reach an internal temperature of 165°F (74°C) to be considered safe to eat. Alternatively, you can cut into the chicken to check if it is no longer pink and the juices run clear.