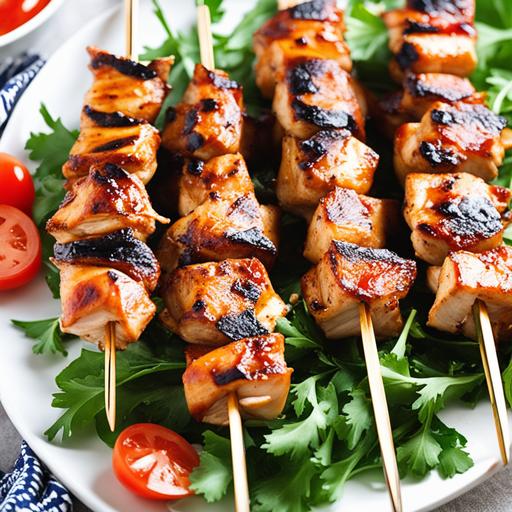
The Ultimate Guide To Flavorful Chicken Skewers: Oven Recipe
Are you craving a mouthwatering and easy-to-make dish? Look no further! Chicken skewers cooked in the oven are a fantastic option to satisfy your taste buds. With their delicate smoky flavor and juicy texture, these succulent morsels are perfect for a quick weeknight meal or a crowd-pleasing entrée for gatherings. This comprehensive guide will explore all the culinary details, food science, selection, cleaning, preparation, tips, variations, doneness checks, and even how to avoid overcooking or undercooking. So, let’s dive into the scrumptious world of chicken skewers!
Understanding the Food Science behind Flavorful Chicken Skewers
Before we delve into the culinary details, let’s explore the underlying food science that contributes to mouthwatering chicken skewers. Chicken, being a lean protein, tends to dry out when cooked at high temperatures. To combat this, marinating the chicken before cooking helps to tenderize and infuse flavors into the meat while ensuring succulence and juiciness.
Marinades typically contain acidic ingredients such as citrus juices, vinegar, or yogurt. The acid helps break down the protein structures, making the meat more tender. Additionally, marinades often contain some oil, herbs, spices, and seasonings, enhancing the overall taste profile of the chicken.
Selecting the Right Chicken for Skewers
When selecting chicken for skewers, it is crucial to keep a few factors in mind. Opt for boneless, skinless chicken breasts or thighs, as they are easier to cut and thread onto skewers. Both cuts have their own unique qualities.
Chicken breasts are lean and mild in flavor, ideal if you prefer a more subtle taste. However, due to their low-fat content, they can dry out easily if overcooked. Chicken thighs, on the other hand, are slightly fattier, resulting in a juicier and more flavorful skewer. They also have a higher tolerance for heat, making them less prone to drying out.
Ultimately, the choice between chicken breasts and thighs comes down to personal preference. You can even mix both cuts for a diverse selection of skewers!
Cleaning and Preparing Chicken for Skewers

Properly handling and preparing the chicken is vital to ensure food safety. Follow these steps to clean and prepare your chicken effectively:
-
Start by washing your hands thoroughly with soap and warm water before handling any raw meat.
-
Rinse the chicken under cold running water to remove any lingering residues.
-
Pat the chicken dry with paper towels to remove excess moisture. This step is essential, as it allows the marinade to adhere better to the meat surface.
-
To remove any remaining fat or sinew, trim the chicken breasts or thighs using a sharp knife. This not only enhances the appearance of the skewers but also improves the overall eating experience.
-
Cut the chicken into equal-sized pieces (approximately 1-inch cubes) to ensure even cooking time.
Maximizing Flavor Infusion: Marinades and Seasonings

Marinating the chicken is a key step in elevating the taste and tenderness of your skewers. A well-crafted marinade can transform a simple chicken skewer into a flavor-packed delight.
Here’s a basic marinade recipe to get you started:
Ingredients:
-
1/4 cup olive oil
-
2 tablespoons freshly squeezed lemon juice
-
2 garlic cloves, minced
-
1 teaspoon dried oregano
-
1 teaspoon paprika
-
Salt and pepper to taste
Instructions:
-
In a bowl, whisk together the olive oil, lemon juice, minced garlic, dried oregano, paprika, salt, and pepper until well combined.
-
Place the chicken pieces in a resealable plastic bag or a shallow dish.
-
Pour the marinade over the chicken, ensuring each piece is coated evenly.
-
Seal the bag or cover the dish with plastic wrap and refrigerate for at least 30 minutes, but preferably 2-4 hours for maximum flavor infusion.
While this basic marinade will undoubtedly yield delicious results, feel free to experiment with different flavor profiles by incorporating various herbs, spices, or even different citrus juices. The possibilities are endless!
Mastering the Art of Skewering Chicken

Now that your chicken is well-marinated, it’s time to thread them onto skewers. Wooden or metal skewers can both be used, with the latter being reusable and more durable. If using wooden skewers, remember to soak them in water for about 30 minutes before threading to prevent them from burning during cooking.
To thread the chicken onto the skewers:
-
Gently slide the marinated chicken cubes onto the skewers, leaving some space between each piece for even cooking.
-
Ensure the chicken is evenly distributed along the skewer to promote uniform cooking.
-
Leave some space at the bottom of the skewer to provide a handle for easy turning.
-
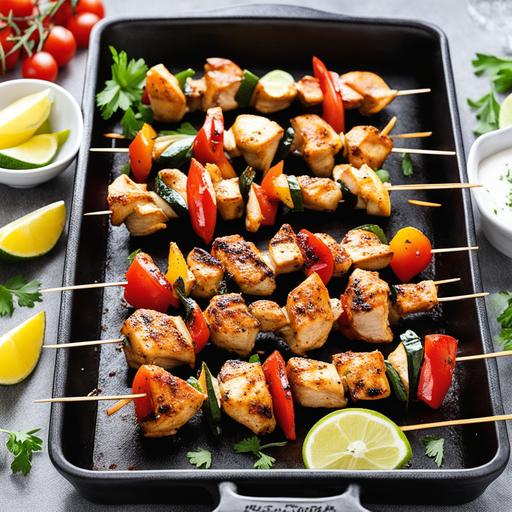
If desired, intersperse the chicken with vegetables such as bell peppers, onions, or cherry tomatoes for a vibrant and flavorful twist.
Now that your skewers are assembled, let’s move on to the cooking process.
Cooking Chicken Skewers to Perfection

Cooking chicken skewers in the oven allows for a consistent and hassle-free experience. Here’s how to achieve juicy skewers with delightful caramelization:
Ingredients:
-
Marinated chicken skewers
-
Salt and pepper to taste
Instructions:
-
Preheat your oven to 425°F (220°C) and position the rack in the middle.
-
Line a baking sheet with aluminum foil or parchment paper and lightly grease it to prevent sticking.
-
Place the skewers on the prepared baking sheet, leaving some space between them for even heat distribution.
-
Sprinkle the skewers with salt and pepper to enhance the flavors.
-
Bake in the preheated oven for approximately 15-18 minutes, or until the chicken reaches an internal temperature of 165°F (74°C).
Remember to flip the skewers halfway through the cooking process to ensure even browning and caramelization.
Checking for Doneness and Avoiding Undercooking or Overcooking
Determining the doneness of your chicken skewers is crucial to achieve the perfect balance between a juicy interior and a slightly crispy exterior. Here are a few methods to ensure your skewers are cooked to perfection:
-
Visual Inspection: The chicken should appear golden brown and caramelized on the outside. The meat should be opaque throughout, with no visible traces of rawness or pinkness.
-
Temperature Check: Using an instant-read thermometer, insert the probe into the thickest part of the chicken without touching the skewer. It should register 165°F (74°C), signaling its readiness to enjoy.
-
Texture Test: When lightly pressed, the chicken should feel firm and springy, rather than soft and squishy. Overcooked chicken will feel dry and firm, so be mindful of the cooking time.
By employing these methods, you can confidently serve perfectly cooked chicken skewers that are sure to impress your guests every time.
Tips and Variations to Elevate your Chicken Skewers
While the basic recipe will certainly satisfy taste buds, here are some tips and variations to take your chicken skewers to new heights:
-
Garnishes and Dips: Sprinkle freshly chopped herbs like parsley or cilantro over the skewers for a burst of freshness. Serve with a flavorful dipping sauce such as tzatziki, chimichurri, or peanut sauce for added richness.
-
Brining Technique: To ensure maximum juiciness, consider brining your chicken before marinating. A simple brine solution of water, salt, and sugar will help the chicken retain moisture during the cooking process.
-
Vegetable Medley: Enhance your skewers by adding a colorful assortment of vegetables such as zucchini, mushrooms, or eggplant. The varying textures and flavors will complement the chicken beautifully.
-
Grilling Option: Alternatively, you can cook the skewers on a preheated grill for those seeking a smoky flavor. Remember to oil the grill grates before adding the skewers to prevent sticking.
Avoiding Overcooking and Undercooking Mishaps
To prevent undercooked or overcooked chicken skewers, keep the following points in mind:
-
Monitoring Cooking Time: Keep a close eye on your skewers while they are cooking, as oven temperatures may slightly differ. Adjust the cooking time accordingly to prevent dry or undercooked chicken.
-
Consistent Size: Ensure all the chicken pieces are cut to the same size for even cooking. This consistency will help prevent some pieces from being undercooked while others become overcooked.
-
Proper Oven Temperature: Use an oven thermometer to verify that your oven is heated to the desired temperature accurately. Inaccurate oven temperatures can significantly affect cooking times.
-
Resting Period: Allow the skewers to rest for a few minutes after removing them from the oven. This resting period allows the juices to redistribute, resulting in more flavorful and succulent skewers.
By taking these precautions, you can avoid the disappointment of undercooked or overcooked chicken skewers and enjoy perfectly cooked ones every time.
In Conclusion
Chicken skewers cooked in the oven offer an incredible medley of flavors to tantalize your taste buds. From understanding the food science behind chicken tenderness to selecting the right cuts, cleaning, and preparing the chicken, this comprehensive guide has covered every aspect you need to create scrumptious skewers. With the knowledge of marinades, seasonings, cooking times, and tips for doneness, you can confidently serve flavorful chicken skewers that will impress your family and friends. So, let your culinary journey begin, and explore the endless possibilities this versatile dish has to offer!
Sources
FAQS On Chicken Skewers Oven Recipe
What Type Of Chicken Should I Use For Chicken Skewers Baked In The Oven?
It is recommended to use boneless, skinless chicken breasts or chicken thighs. Cut the chicken into small, even pieces for easy skewering and even cooking.
Do I Need To Marinate The Chicken Before Baking It On A Skewer?
Marinating the chicken before baking can add extra flavor and tenderness. You can marinate the chicken in a mixture of olive oil, lemon juice, garlic, and herbs for at least 30 minutes before skewering and baking.
How Long Should I Cook Chicken Skewers In The Oven?
Bake the chicken skewers in a preheated oven at 400°F for 20-25 minutes. Turn the skewers over halfway through cooking for even browning.
Can I Use Vegetables On The Chicken Skewers As Well?
Yes, you can add vegetables like bell peppers, onions, and zucchini to the skewers for added flavor and nutrition.
Can I Make Chicken Skewers Ahead Of Time And Refrigerate Them Before Baking?
Yes, you can assemble the chicken skewers ahead of time and refrigerate them until ready to bake. Allow them to come to room temperature for about 10-15 minutes before baking for even cooking.


