

The Ultimate Corn On Cob Oven Recipe: A Delightful And Flavorful Summer Treat
Corn on the cob is a beloved summertime staple that brings a burst of sweetness and satisfaction to our taste buds. It’s a versatile, nutritious, and budget-friendly option that adds a pop of color and flavor to any meal. In this comprehensive guide, we’ll delve into the fascinating food science behind corn, explore various culinary details, offer tips on selection, cleaning, and preparation, provide crucial doneness checks, and present a mouth-watering corn on the cob oven recipe that will leave you wanting more.
The Science of Corn
Understanding the Anatomy
Corn, scientifically known as Zea mays, is a cereal grain of the grass family. Each "ear" of corn consists of elongated cylindrical units called cobs. These cobs are covered in husks, protecting the tender kernels underneath. Each cob can contain around 800 kernels, arranged in rows.
Nutritional Value
Corn is not only delicious but also provides essential nutrients for our bodies. It offers a good source of dietary fiber, which aids in digestion and helps maintain a healthy weight. Corn is also rich in antioxidants, vitamins, and minerals, including vitamin C, folate, and magnesium. These nutrients contribute to improving immunity, supporting brain health, and promoting cardiovascular well-being.
Culinary Details and Selection
When selecting corn, there are a few key factors to consider.


Freshness is Key
To ensure maximum flavor and sweetness, opt for fresh corn. Check for bright green, tightly closed husks, and avoid any with brown or dry patches. The silk (the fine strands found between the kernels and the cob) should be golden-brown, moist, and free from mold or decay.
Variety Matters
Corn comes in various varieties, each having its unique characteristics. The most common types are yellow, white, and bi-colored (yellow and white). Yellow corn tends to be slightly sweeter and more flavorful, while white corn has a milder taste. Bi-colored corn offers the best of both worlds, combining a gentle flavor with a hint of sweetness.
Cleaning and Preparation
Now that you’ve carefully selected your corn, it’s time to clean and prepare it for cooking.
Step 1: Husking
Start by removing the husks from each ear of corn. Grasp the top of the husk and gently pull it down toward the bottom of the ear. Peel away the husk in one smooth motion, removing any remaining silks along the way. For easier husking, you can use a pair of kitchen shears to trim the top of the husk before pulling it down.
Step 2: Silking
Once the husks are removed, inspect the cob for any remaining silks. Run your hands gently over the corn, removing any lingering strands. A damp paper towel can be used to assist in removing stubborn silks.
Step 3: Soaking
For the perfect corn on the cob, soaking can add an extra layer of moisture. Fill a large bowl or sink with cold water and place the cleaned cobs inside to soak for 30 minutes. This allows the kernels to absorb water, enhancing their tenderness and juiciness when cooked.
Tips for Cooking Corn on the Cob in the Oven
Now that your corn is ready, let’s dive into the different ways you can cook it in the oven. This method offers a deliciously roasted flavor and evenly cooks the corn, resulting in a tender and juicy experience.
Preheating the Oven
Before cooking the corn, preheat your oven to 400°F (200°C). This ensures a consistent and efficient cooking temperature throughout.
Variations
While plain corn on the cob is incredibly delicious on its own, you can elevate its flavor by experimenting with various seasonings and toppings. Here are a few popular variations to consider:
Seasoned Butter
Prepare a flavored butter mixture by blending softened butter with spices such as garlic powder, smoked paprika, or chili flakes. Once the corn is cooked, generously brush the seasoned butter over the cobs for a burst of flavor.
Mexican Street Corn
Indulge in the vibrant flavors of Mexican street corn, known as "Elote." After roasting the corn, slather it with mayonnaise, sprinkle crumbled cheese (such as Cotija or feta), and garnish with a squeeze of fresh lime juice and chopped cilantro.
Herb-infused Corn
For a more herbaceous twist, rub the corn with a mixture of olive oil, fresh herbs (such as thyme, rosemary, or basil), and a pinch of salt and pepper. Roast it in the oven until golden brown for an aromatic and flavorful experience.
Cooking Method
Step 1: Place the Corn on a Baking Sheet
Line a baking sheet with aluminum foil for easy cleanup. Lay the soaked and seasoned corn cobs evenly on the sheet, ensuring they have enough space between them for proper airflow.
Step 2: Roasting
Slide the baking sheet into the preheated oven and let the corn cook for 20-25 minutes, or until the kernels are tender. Remember to flip the cobs halfway through the cooking process to achieve an even roast on all sides.
Doneness Checks
The key to perfectly cooked corn on the cob is achieving the ideal doneness. Here are a few indicators to ensure you get it just right:
Kernel Tenderness
Gently press a kernel with your finger. If it feels tender, yet firm, it’s a sign that the corn is cooked to perfection. Avoid overcooking, as it can result in mushy kernels.
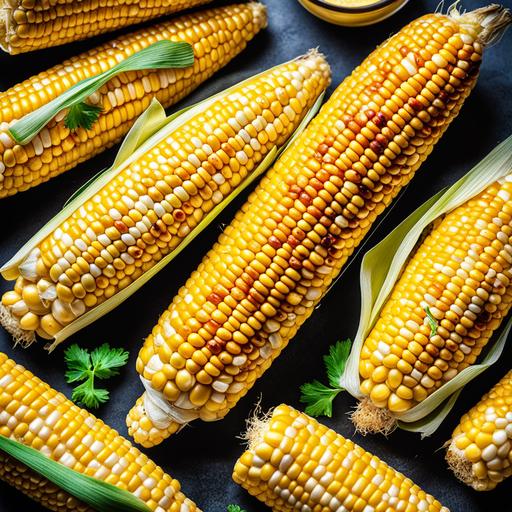
Golden Brown Roast
When the corn is ready, the exposed kernels should have a beautiful golden brown hue, imparting a delightful roasted flavor.
Overcooking and Undercooking
Avoiding these common pitfalls will help you savor the perfect ear of corn.
Overcooking
Overcooked corn can become mushy and lose its natural sweetness and texture. To prevent this, keep a close eye on the roasting process and remove the corn promptly when tender.
Undercooking
Undercooked corn can be tough and not as enjoyable to eat. If you find the kernels aren’t as tender as desired, pop them back into the oven for a few extra minutes until they reach the desired consistency.
Conclusion
As you embark on your corn on the cob oven cooking adventure, armed with scientific insights, culinary details, and essential tips, you’re sure to master this delightful summer treat. From selecting the freshest corn to diligently cleaning and preparing it, each step contributes to the final burst of flavor and juiciness that awaits. Whether you opt for a seasoned butter, Mexican street corn, or herb-infused variation, the oven roasting method guarantees an evenly cooked, tender, and beautifully roasted corn on the cob. So gather your loved ones and indulge in this delicious summer delight – it’s a surefire way to create memorable moments and savor the taste of summer!
Sources
FAQS On Corn On Cob Oven Recipe
What Temperature Should I Set My Oven For Corn On The Cob?
Preheat your oven to 350°F (175°C) for corn on the cob in the oven.
How Long Does It Take To Cook Corn On The Cob In The Oven?
It takes approximately 30-35 minutes to cook corn on the cob in the oven.
Do I Need To Wrap The Corn On The Cob In Foil?
It is not necessary to wrap the corn on the cob in foil, but it can help to keep the kernels moist and retain flavor.
Can I Add Seasoning To Corn On The Cob In The Oven?
Yes, you can season your corn on the cob with butter, salt, pepper, or any other seasoning of your choice before wrapping it in foil and placing it in the oven.
What Type Of Corn Is Best For Corn On The Cob In The Oven?
Any variety of fresh corn on the cob can be used for this recipe, it is recommended that you choose the sweetest available for optimal flavor.